


When you season a cast iron skillet, you’re not just oiling a pan—you’re kicking off a chemical reaction that creates a natural, non-stick cooking surface. The process is called polymerization, where you bake a thin layer of oil onto the pan, transforming it into a hard, slick coating. This layer protects the iron from rust and, believe me, it only gets better the more you cook with it. Once you get the hang of this, you’ll have a kitchen workhorse that could literally last a lifetime.
The Magic Behind a Perfectly Seasoned Skillet
Ever wondered what makes an old cast iron skillet so legendary? It’s not just the heavy-duty metal; it’s the seasoning. And no, I don’t mean salt and pepper. This is pure kitchen chemistry at its finest.
Here’s what happens: when you heat fats or oils in your skillet, they undergo an incredible transformation. The high temperature causes long chains of fat molecules to break down, reorganize, and bond directly to the cast iron’s porous surface.
They essentially create a new, plastic-like layer that is tough, durable, and surprisingly non-stick. Every time you cook with a little oil or apply a fresh coat of seasoning, you’re building up this protective shell, one micro-layer at a time.
Why This Is a Step You Can’t Skip
A solid seasoning layer does more than just help you flip eggs without a fight. It serves a few critical functions that turn a simple hunk of metal into one of your most valuable kitchen tools.
- It Creates a Natural Non-Stick Surface: Forget synthetic chemical coatings. A well-seasoned pan lets food slide right off, which is a huge advantage when you’re weighing the pros and cons of stainless steel vs nonstick cookware.
- It Protects Against Rust: Iron’s number one enemy is moisture. That polymerized oil creates a waterproof shield, preventing the rust that can quickly ruin a bare skillet.
- It Builds Flavor Over Time: With every meal, the seasoning deepens and subtly enriches the taste of your food. This is exactly why those heirloom skillets passed down through generations are so prized.
Your goal is to build a slick, blackened patina that feels smooth to the touch. This isn’t just a coating; it’s a carbonized layer that literally becomes part of the pan, making it tougher and better with age.
From Household Chore to Cherished Ritual
This whole process has been a cornerstone of home cooking for generations. When flat-bottomed cast iron skillets became popular alongside cooking stoves in the late 19th century, seasoning went from a simple necessity to a genuine kitchen ritual.
Modern know-how confirms what old-timers always knew: baking a thin coat of oil at 350-450°F causes it to polymerize into a layer that can reduce food sticking by up to 90% after just a few cycles. It’s a simple technique with a huge payoff.
Choosing the Best Oil for a Durable Seasoning
The oil you choose is the absolute bedrock of your skillet’s non-stick surface. Seriously. Think of it as the primer for a paint job—get this part right, and the finish will be tough, slick, and long-lasting. Get it wrong, and you’ll be scraping off sticky spots or a flaky coating in no time.
Not all fats are up to this important task. The secret here is a little bit of kitchen science.
The Magic of Polymerization and Smoke Points
The goal is to pick an oil that will polymerize, a fancy word for transforming from a liquid fat into a hard, solid layer when you heat it up. This whole process hinges on one crucial factor: the oil’s smoke point.
The smoke point is exactly what it sounds like—the temperature where an oil stops shimmering and starts smoking, breaking down into a burnt, bitter mess. To get that perfect seasoning, you actually need to heat the oil beyond its smoke point to kick off polymerization.
Using an oil with a high smoke point gives you a much wider, more forgiving temperature window. This helps ensure a strong bond without setting off every smoke detector in a three-block radius. A common rookie mistake is reaching for something like extra virgin olive oil. Its smoke point is too low, so it just burns at typical oven temperatures, creating a weak, uneven layer that’s prone to flaking off later.
A high smoke point isn’t just about avoiding a smoky kitchen; it’s about creating a more stable chemical reaction. The result is a harder, more durable non-stick surface that can handle the heat when you’re searing a steak down the road.
Comparing the Top Oils for Seasoning
While you can technically use almost any cooking oil you have on hand, some just consistently produce better, more reliable results. Your final choice often comes down to a simple balance of performance, how easy it is to find, and cost.
Let’s talk about the most popular options.
- Grapeseed Oil: This is a fan favorite for a reason. It has a high smoke point (around 420°F), it’s relatively inexpensive, and it creates a fantastic, non-sticky finish. It’s my personal go-to.
- Canola or Vegetable Oil: Don’t sleep on these pantry staples. They are excellent, budget-friendly choices that get the job done reliably. If you’re new to seasoning cast iron, this is a great place to start.
- Flaxseed Oil: You’ll often hear this hailed as the “gold standard” by cast iron purists because it creates an incredibly hard, durable finish. The downside? It’s expensive, and if you don’t apply it in perfectly thin layers, it can be prone to flaking. It’s a bit high-maintenance.
- Avocado Oil: With one of the highest smoke points out there (over 500°F), this is a superb but often pricey option. It builds a tough, resilient coating that can take a beating.
Choosing the right oil can feel like a big decision, but it’s hard to go wrong with the basics. Here’s a quick comparison to help you decide.
Comparison of Common Seasoning Oils
This table breaks down the most popular oils for seasoning cast iron, looking at their smoke point, cost, and the kind of finish you can expect.
| Oil Type | Smoke Point (°F) | Pros | Cons |
|---|---|---|---|
| Grapeseed Oil | 420°F | High smoke point, neutral flavor, relatively affordable, creates a slick and durable finish. | Not as common in all grocery stores. |
| Canola/Vegetable Oil | 400°F | Very inexpensive, widely available, reliable and consistent results. A great workhorse oil. | Finish may not be quite as hard as flaxseed or grapeseed. |
| Flaxseed Oil | 225°F | Creates an extremely hard, almost enamel-like finish. | Low smoke point, expensive, prone to flaking if not applied perfectly. Not beginner-friendly. |
| Avocado Oil | 520°F | Extremely high smoke point, creates a very tough and resilient seasoning layer. | Can be very expensive compared to other options. |
Ultimately, the best oil is one you have on hand and will actually use. For most home cooks, grapeseed and canola oil offer the perfect blend of performance and value. They’ll give you a fantastic seasoning without you having to shell out for a specialty product.
The Oven Method for a Flawless Foundation
If you’re starting with a brand-new skillet or one you’ve stripped down to the bare metal, the oven method is your best friend. This is how you build that bulletproof, non-stick foundation from the ground up. It takes a little patience, but getting the details right here is what transforms a simple pan into a kitchen powerhouse.
First things first: your pan needs to be perfectly clean and bone-dry. Any lingering moisture is the enemy here. If it gets trapped under the oil, you’ll end up with rust spots or a splotchy, uneven finish. Take an extra minute to make sure it’s completely dry before you even think about grabbing the oil.
Applying the Oil The Right Way
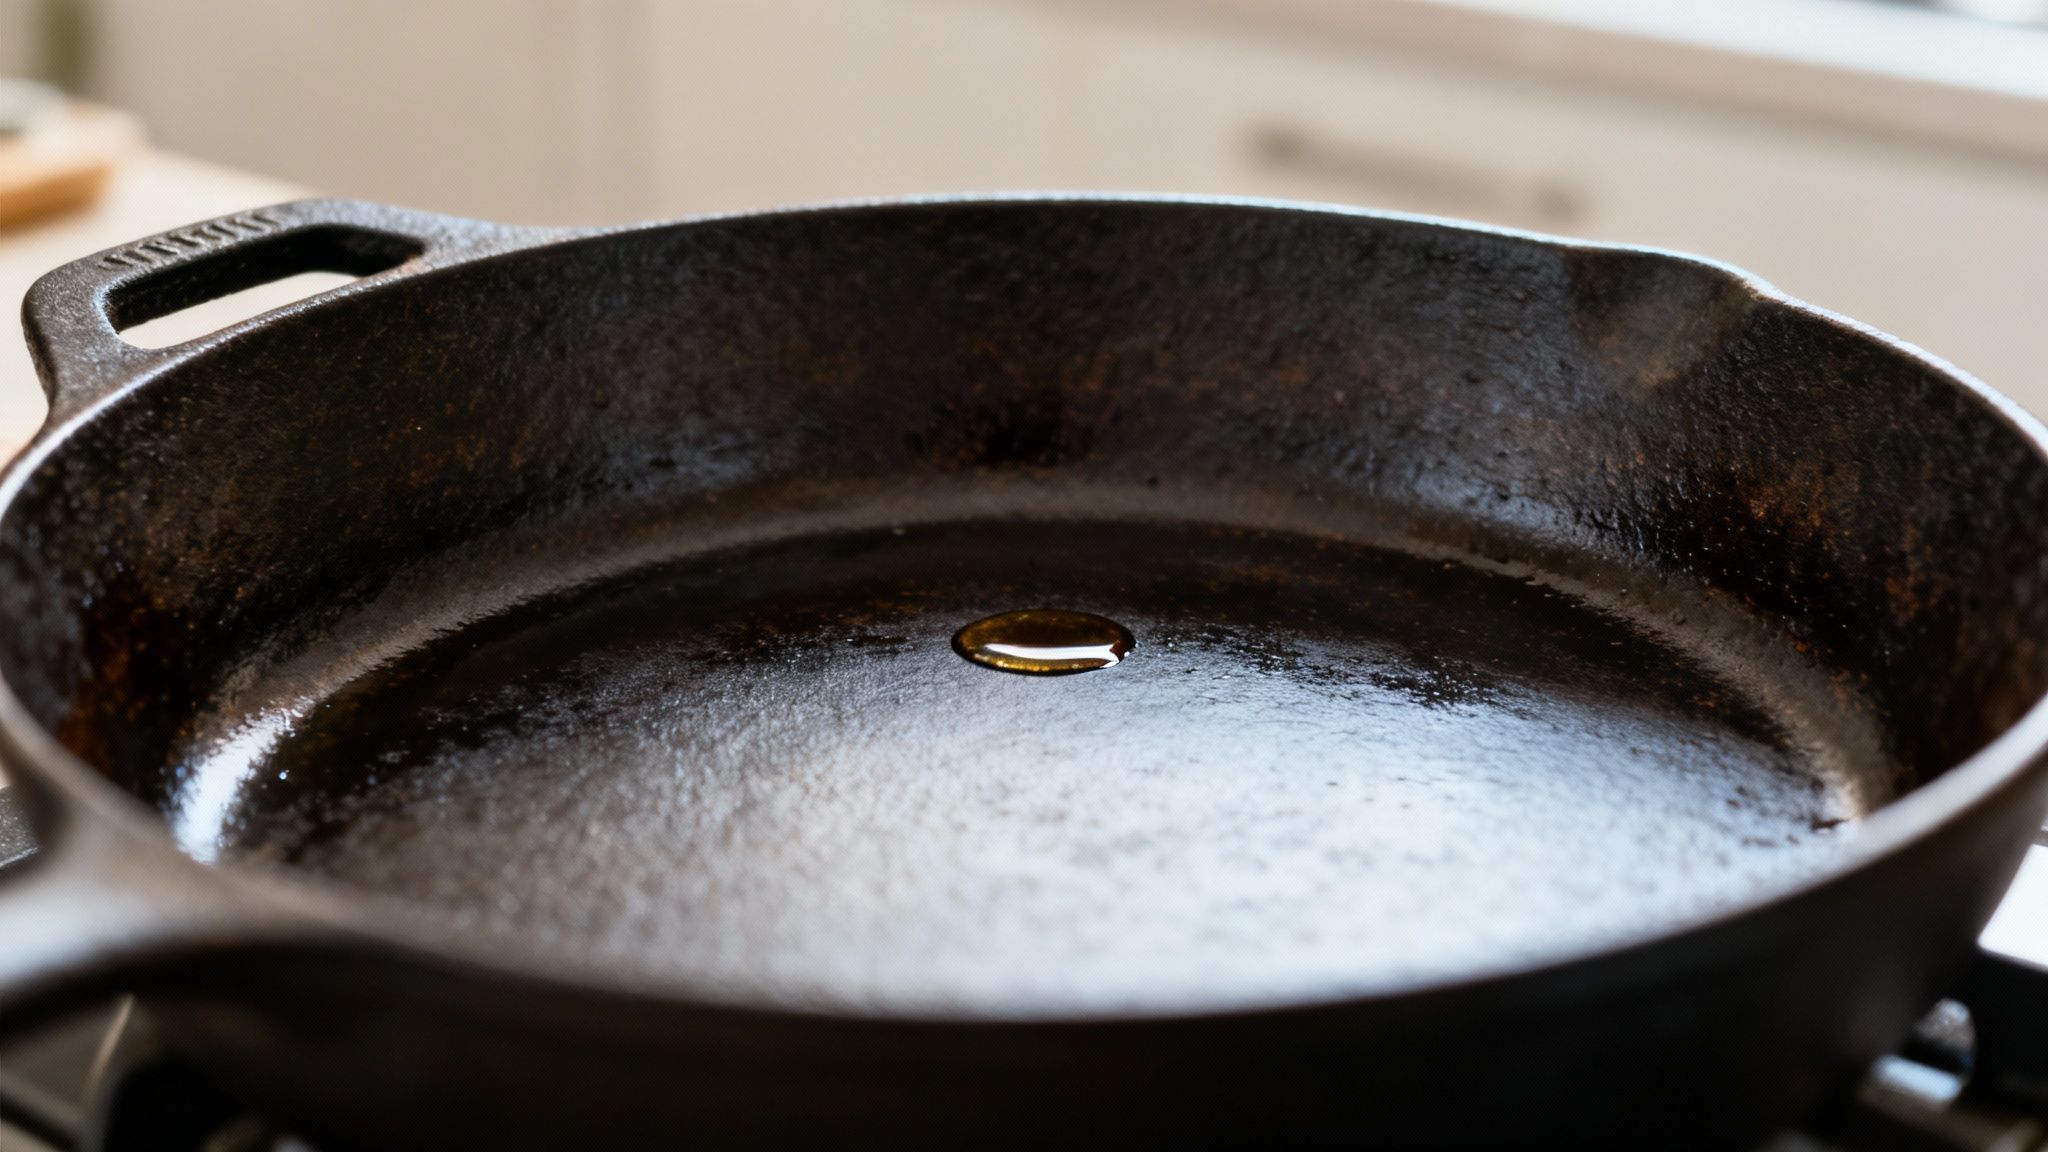
This is where most people get it wrong, so listen closely: less is more. I mean it. You’re aiming for an incredibly thin, almost invisible layer of oil. Pour a tiny amount—about a teaspoon—of your chosen high-smoke-point oil into the skillet.
Grab a paper towel or a lint-free cloth and rub that oil into every single nook and cranny. Cover the cooking surface, the outside walls, the bottom, and don’t forget the handle. Once you think it’s fully coated, take a clean, dry paper towel and wipe it all off. Seriously. It will look like you’ve removed all the oil, but a microscopic film will remain. That’s exactly what you want.
The biggest mistake you can make is leaving a thick coat of oil on the pan. It won’t polymerize correctly. Instead, it will bake into a sticky, gummy mess that feels tacky and attracts gunk. The goal is a hard, slick surface, and that only comes from super-thin layers.
Setting the Right Temperature and Time
With your pan properly prepped, it’s time for the heat. You need to get the oven hot enough to push the oil past its smoke point. This is the magic moment where polymerization—the chemical reaction that creates the seasoning—kicks in.
For most common seasoning oils, the sweet spot is somewhere between 450-500°F (230-260°C).
- Get your oven preheating to your target temp.
- Slide a large baking sheet or a sheet of aluminum foil on the bottom rack. This is just insurance to catch any drips (though if you wiped correctly, there shouldn’t be any).
- Place your oiled skillet on the middle rack, upside down. This part is non-negotiable. It ensures any minuscule excess oil drips away instead of pooling in the bottom of your pan.
Let the skillet bake for one full hour. When the timer goes off, just turn the oven off and walk away. Leave the pan inside to cool down completely with the oven. This slow, gradual cooling helps the new seasoning layer cure properly and prevents any thermal shock that could crack the iron.
This quick visual guide can help you figure out which oil is best for your needs, factoring in smoke point, durability, and cost.
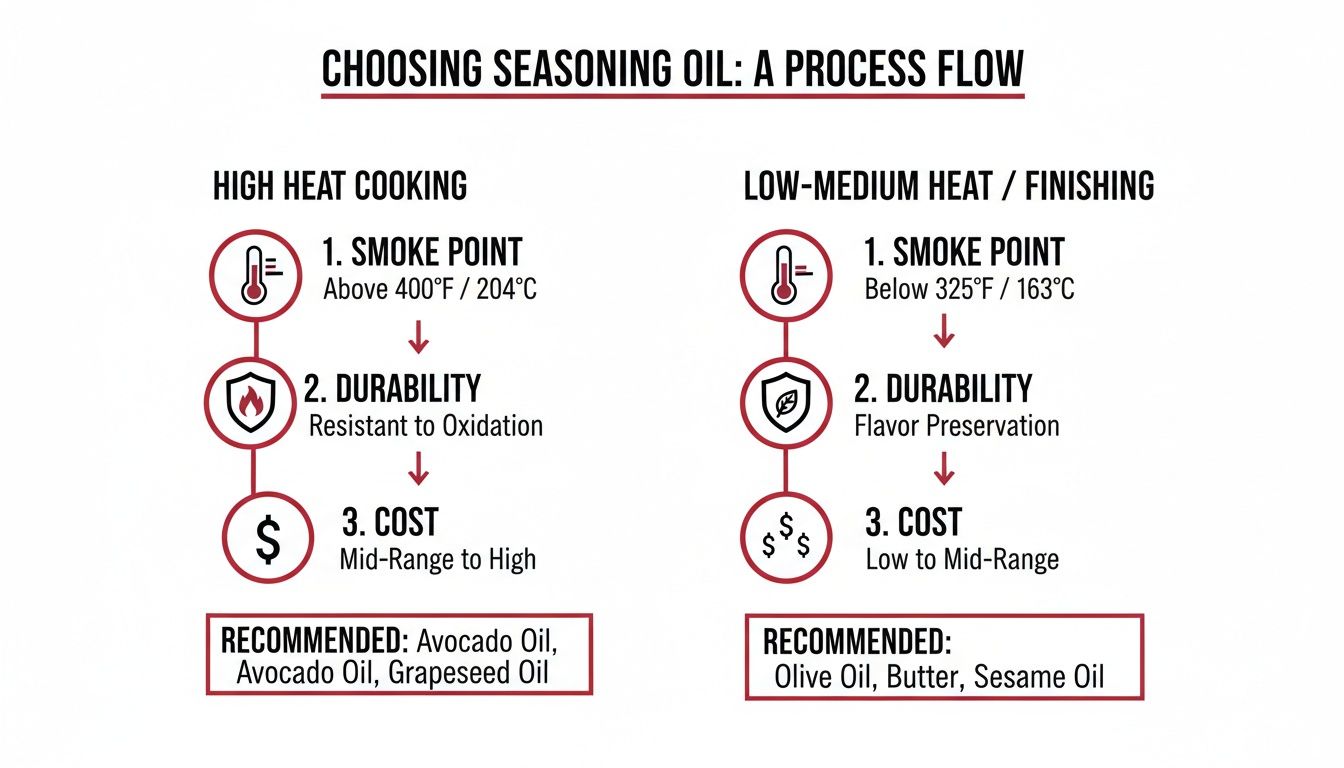
As the chart shows, while lots of oils will get the job done, ones with higher smoke points like grapeseed or avocado tend to create the most durable finish for high-heat cooking.
Building Resilient Layers for Longevity
One coat of seasoning is a good start, but multiple coats are what build that deep-black, slick-as-glass patina we’re all after. For a new or freshly stripped skillet, you’ll want to repeat this entire process—oiling, wiping, baking, and cooling—at least three to five times. Each cycle adds another micro-layer, making the surface stronger and more non-stick.
This initial effort is what gives cast iron its generational lifespan, something you’ll never get from a trendy non-stick pan that wears out in a few years. It’s a process that companies like Lodge Cast Iron have perfected since they started selling pre-seasoned skillets back in 2002. You can read more about their history and the impact of pre-seasoning at LodgeCastIron.com. Trust me, the time you put in now pays off every single time you cook.
Mastering the Stovetop Method for Daily Upkeep
While the big oven-seasoning project builds that perfect, non-stick foundation, it’s the daily stovetop touch-up that keeps it that way. Think of it as the simple ritual that maintains all your hard work. This isn’t for seasoning a pan from scratch; this is your go-to move for a quick refresh after you cook.
Honestly, mastering this little habit is the secret weapon for a perpetually slick, ready-to-go skillet. The whole thing takes less than two minutes and is the single best way to protect your non-stick layer. It reinforces the polymer coating, drives out every last bit of moisture after washing, and keeps your pan shielded from rust.
The Two-Minute Maintenance Routine
The magic of stovetop seasoning is all about simplicity and doing it every single time. It’s so quick you can just tack it onto your normal cleanup routine without even thinking about it.
Here’s how it’s done:
- Clean and Dry Completely: After you’re done cooking, wash your skillet with warm water (a tiny drop of mild soap is fine if you need it). The moment you’re done washing, dry it thoroughly with a towel. Then, pop it on the burner over low heat for a minute to make sure every last molecule of water has evaporated.
- Apply a Micro-Layer of Oil: Add just a few drops of oil to the warm pan. Grab a paper towel and wipe the oil over the entire cooking surface. You’re aiming for a barely-there sheen, not a greasy mess.
- Heat Until It Smokes: Crank the heat up to medium-high and keep an eye on it. In a minute or two, you’ll see the oil start to give off little wisps of smoke. That’s your signal that polymerization is happening—the oil is bonding to the iron.
- Cool and Store: As soon as you see that smoke, kill the heat. Let the skillet cool down right there on the burner before you put it away.
This quick heating cycle is basically a mini-seasoning session. It polymerizes that fresh, thin layer of oil, effectively patching up any tiny spots of wear and tear from your last meal. It’s what keeps that non-stick surface in peak condition day after day.
When to Use Stovetop vs. Oven Seasoning
Knowing which method to pull out of your back pocket is key. The stovetop method is your champ for daily maintenance. It’s what you do after you cook, wash, and dry your pan. It works especially well on gas cooktops, where the direct flame gives you quick, responsive heat. In fact, a well-maintained cast iron skillet is arguably one of the best pans for a gas cooktop because of how well they work together.
But a quick stovetop touch-up isn’t a cure-all. You need to go back to the full-blown oven method in a few specific situations:
- When you bring home a brand-new skillet.
- If you’ve had to strip the pan down to bare metal to get rid of rust.
- When the seasoning is noticeably patchy, flaking, or feels sticky all over.
A good way to think about it is this: the oven method builds the house, and the stovetop method does the daily housekeeping to keep it looking great.
How to Fix Common Cast Iron Seasoning Mistakes
Even the most seasoned (pun intended) cast iron enthusiasts run into trouble now and then. Don’t sweat it—nearly every seasoning mistake is fixable. Learning to spot and solve these common issues is the final step toward true cast iron confidence.
Whether your pan feels tacky, looks flaky, or has developed a dreaded orange tinge, there’s a straightforward fix to get your skillet back into fighting shape.
Dealing with a Sticky or Gummy Surface
This is, by far, the most common misstep I see. The cause is simple: you used too much oil. When the layer of oil is too thick, it can’t fully polymerize into that hard, slick surface we’re all after. Instead, it just sort of bakes into a soft, sticky residue that feels tacky to the touch.
- The Quick Fix: Whatever you do, don’t scrub it! Just pop the sticky pan back in a 450-500°F oven, upside down, for another hour. The extra time at high heat will help that excess oil finally complete the polymerization process, hardening it into a proper layer of seasoning.
Next time, remember the golden rule of seasoning: wipe the oil on, then wipe it all back off as if you made a mistake. That nearly invisible film left behind is all you need.
Fixing Patchy or Flaking Seasoning
Seeing little black flecks coming off your pan can be alarming, but it doesn’t mean your skillet is ruined. Flaking usually happens for one of two reasons: either an initial layer of seasoning was caked on too thickly and never bonded correctly, or a weaker, older layer is making way for a stronger one you’ve been building.
- The Solution: The best move here is to get rid of all the loose bits. Grab a metal spatula or some steel wool and gently scrub away any flaking spots until the surface feels smooth again. Give it a good wash, dry it completely, and then run it through two or three new rounds of oven seasoning to build back a solid, unified foundation.
Don’t panic when you see flakes. It’s often just the pan shedding a weak layer to make room for a better one. Think of it as a necessary step toward a more durable, long-lasting surface.
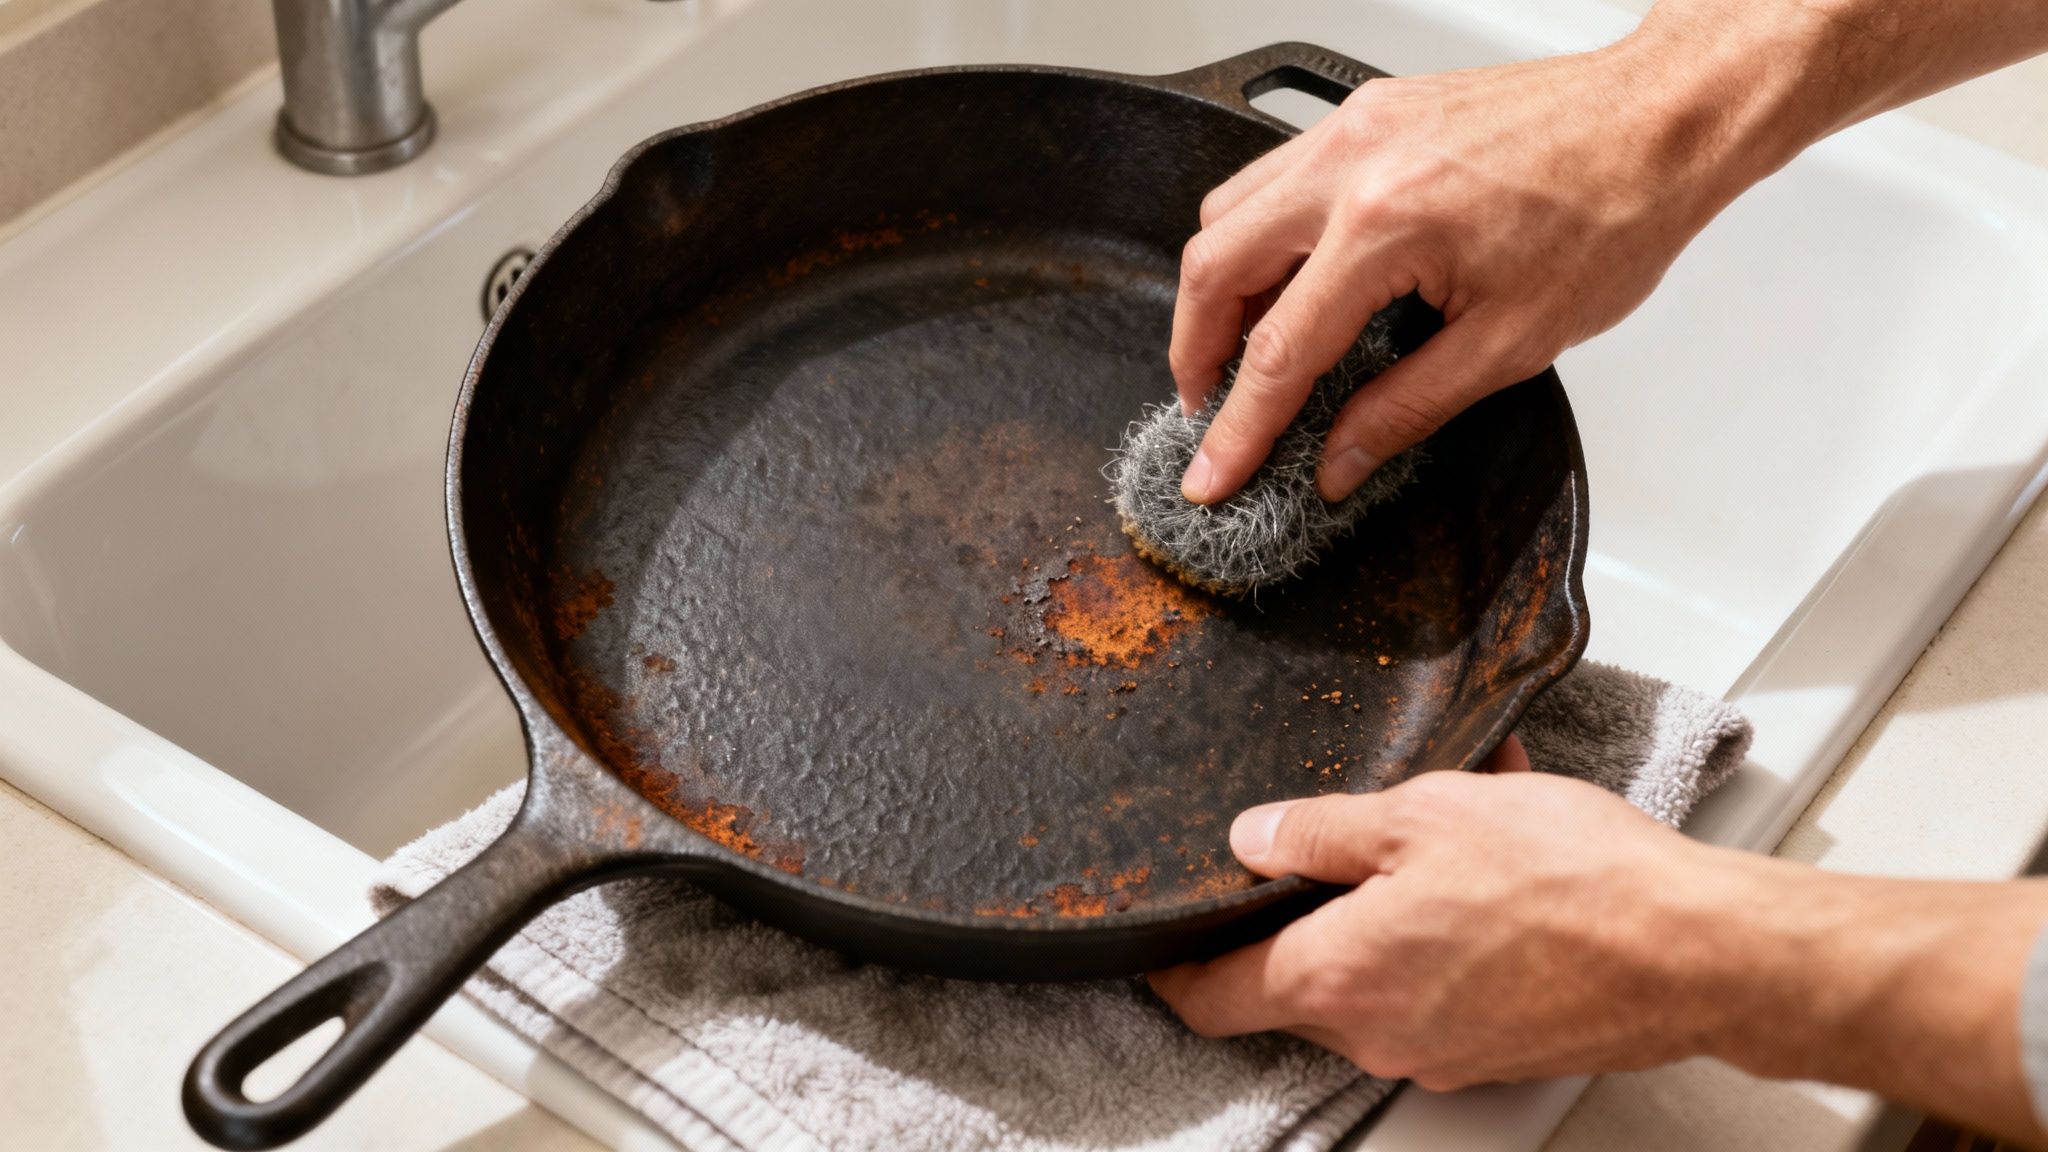
How to Eradicate Rust Spots
Rust is iron’s natural enemy, but thankfully, it’s pretty easy to defeat. It only shows up when the pan has been exposed to moisture for too long—maybe it wasn’t dried thoroughly after washing or, heaven forbid, it was left to soak in the sink. That protective seasoning barrier is what keeps this from happening.
In fact, an unseasoned cast iron skillet can leach a surprising 10.8 mg of iron into food, while a well-seasoned pan transfers almost none. It just goes to show how vital that polymerized oil shield really is. You can find more fascinating tidbits about the history of cast iron cookware on WebstaurantStore.com.
To get rid of rust, here’s what you do:
- Use fine steel wool, a bit of water, and some good old-fashioned elbow grease to scrub away every bit of rust until you see the bare metal again.
- Wash the skillet with soap and water, then dry it immediately and completely. Don’t let it air dry!
- Right away, start the seasoning process from scratch with a full oven seasoning session to re-establish that crucial protective layer.
Your Cast Iron Questions, Answered
Even with the best instructions, cast iron can feel a little mysterious. It comes with a lot of old-school rules and myths, but honestly, the reality is much simpler. Let’s tackle some of the most common questions so you can feel completely confident with your skillet.
Once you get these down, you’ll move from just following steps to truly understanding your cookware.
How Often Should I Re-Season My Skillet?
This is probably the most common question I get, and the honest answer is: it depends on how you use it. When you get a brand-new pan or have to strip an old one down, running it through 3-4 rounds of oven seasoning is a brilliant way to build up a solid foundation. After that, it’s all about upkeep.
The best thing you can do is a quick stovetop seasoning after you cook. It’s a two-minute habit that keeps that non-stick surface in perfect shape by constantly reinforcing the layers you’ve already built.
You only really need to do a full-blown oven re-seasoning when something has gone wrong. Think of it as a reset button you press when:
- You’ve got significant rust spots that had to be scrubbed away.
- The seasoning is flaking off in big patches, not just tiny flecks.
- Food is sticking all the time, no matter how well you preheat or how much oil you use.
A well-loved, frequently used skillet might only need a full oven treatment once a year—if that.
Is It Really Okay to Use Soap on Cast Iron?
Yes! A thousand times, yes. You can absolutely use a little bit of mild dish soap on your cast iron. This is one of the biggest myths out there, and it’s completely outdated. The fear comes from a time when soap was made with lye, which is harsh enough to strip seasoning right off.
Modern dish soaps are gentle and totally safe for a well-seasoned pan. That hardened, polymerized layer of oil is much tougher than you think; a quick wash won’t hurt it.
The real rules for cleaning are simple: never let it soak in water, don’t go to town with super abrasive scrubbers (unless you’re planning to re-season anyway), and always dry it completely the second you’re done washing. A final wipe of oil is the perfect finishing touch.
What Causes Seasoning to Flake Off?
Finding little black specks in your food can be alarming, but it’s rarely a disaster. Flaking usually happens for a couple of key reasons. The most common culprit is applying the oil too thickly during the initial seasoning rounds, which stops it from bonding properly to the iron.
It can also be a weird sign of progress. Sometimes, weaker or poorly bonded layers of seasoning will flake off to make way for the stronger, more durable layers you’re building with every cook.
Fixing it is straightforward. Grab a stiff brush or some steel wool and gently scrub away any loose bits until the surface feels smooth again. Wash and dry the pan, and then run it through two or three new rounds of oven seasoning to build back a solid, even foundation.
Why Does My Pan Feel Sticky After Seasoning?
If your pan has a tacky, gummy, or sticky feel, it’s a dead giveaway that you used too much oil. When the oil is applied too thickly, it can’t fully “polymerize”—or harden into that slick, non-stick surface. Instead, it just bakes into a gross, semi-cured residue that attracts dust and food.
Luckily, the fix is incredibly simple. Just pop the sticky skillet back in the oven, upside down, at 450-500°F for another hour. The extra time at high heat will help that excess oil finish the polymerization process and cure properly. Moving forward, always remember to wipe off as much oil as you possibly can before you put it in the oven. The pan should look almost dry.
While cast iron is a fantastic and durable choice, it’s always wise to understand all your options. For those curious about other non-toxic cookware, you can explore the question of is ceramic cookware safe in our detailed guide.
At Reva Housing, our goal is to help you find kitchen and homeware you’ll love for years to come. For more in-depth reviews and guides, check out our latest articles at https://revahousing.com.