


Getting your garden ready for winter is all about strategic cleanup, protecting your plants, and giving your soil a boost for the coming spring. I usually break it down into three main phases: clearing out summer’s leftovers, shielding vulnerable plants from frost, and beefing up the soil with organic goodies and mulch. If you can knock these out before the ground freezes solid, you’re setting yourself up for a fantastic growing season next year.
Why Bother Prepping Your Garden for Winter?
As the buzz of summer fades, your garden heads into a critical transition. Putting your outdoor space to bed for the season is so much more than a simple tidy-up—it’s a real investment in the future health of your soil, plants, and even your tools.
Think of it as tucking your garden in for a long, restorative sleep. This prep work stops pests and diseases from bunking down for the winter, protects precious roots from harsh freeze-thaw cycles, and enriches the soil so it’s primed and ready for planting. A garden that’s been properly winterized doesn’t just survive the cold; it comes back stronger.
Your Seasonal Timeline for Success
Knowing what to do is only half the battle. Knowing when to do it is what really separates a garden that thrives from one that just survives. Timing your tasks with the rhythm of the seasons—from those last warm days of late summer to the first hard frost—is everything.
This timeline is a great visual guide to help you get your garden prep organized and done at just the right time.
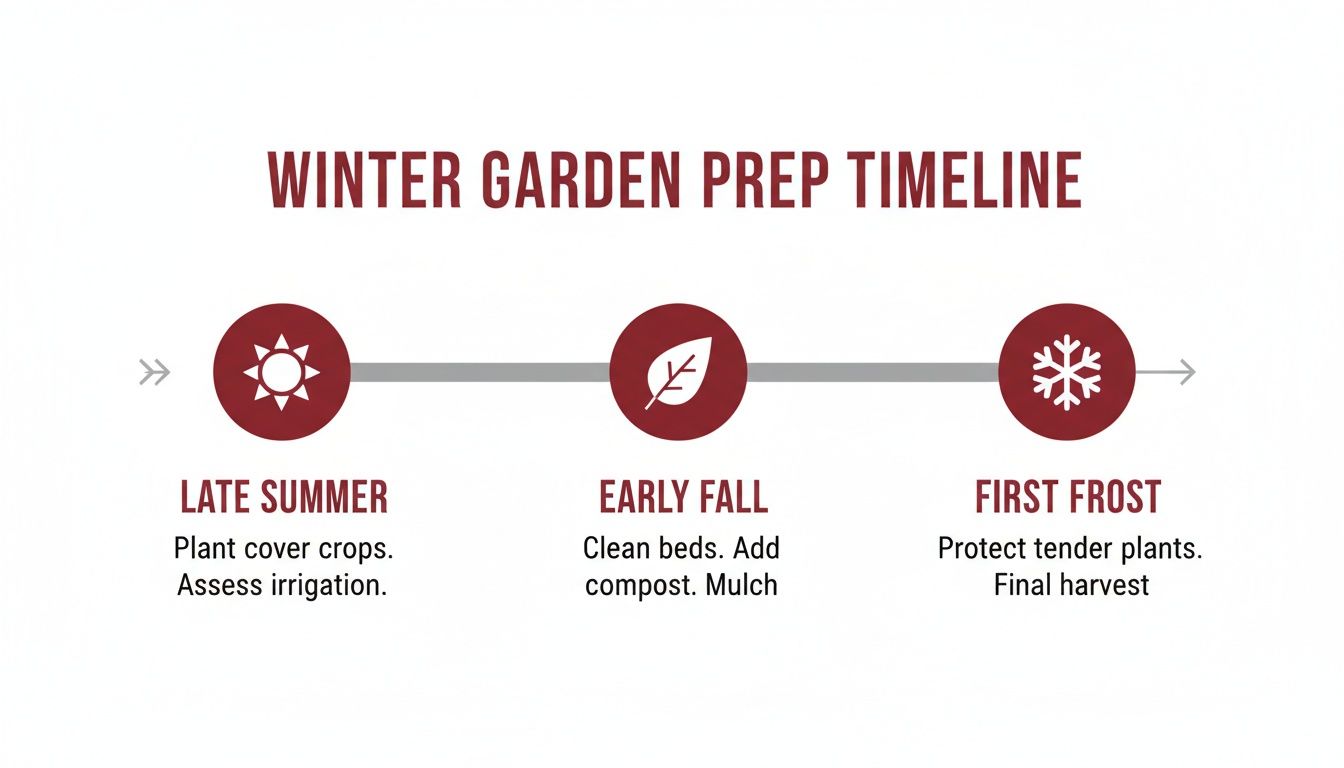
As you can see, late summer is perfect for the initial cleanup and planning. Early fall is when the heavy lifting happens—planting bulbs, amending soil. Right around that first frost is your last chance to apply protective mulch and get your tools stored away for the winter.
Understanding Your Local Timeline
The exact timing for all this really comes down to your local climate. One of the best natural signals is day length; most plant growth grinds to a halt when we drop below ten hours of daylight. This can vary wildly depending on where you live.
For instance, gardeners in US Zone 4 might see their first frost by mid-September, while folks down in Zone 9 often have until mid-December to wrap things up. This is a huge difference! It means summer crops like tomatoes and peppers need to be pulled in early fall to make room for hardy winter greens in colder climates.
To help you nail down the timing for your specific area, here’s a quick-glance table based on USDA Hardiness Zones.
Winter Prep Timeline by Climate Zone
This table gives you a general idea of when to tackle key winter prep tasks based on the typical first frost dates in different climate zones.
| USDA Zone | Typical First Frost | Key Tasks to Complete |
|---|---|---|
| Zones 3-4 | Late August to Mid-September | Harvest final summer crops, remove annuals, plant spring bulbs, apply thick mulch. |
| Zones 5-6 | Late September to Mid-October | Cut back perennials, protect roses, winterize irrigation systems, clean and store tools. |
| Zones 7-8 | Late October to Mid-November | Plant cover crops, apply compost, wrap tender shrubs, bring container plants indoors. |
| Zones 9-10 | Late November to Mid-December | Final lawn care, light pruning of trees/shrubs, apply winter mulch, plan spring garden. |
Remember, these are just guidelines. Always keep an eye on your local forecast, as mother nature loves to keep us on our toes.
Key Takeaway: A successful winter prep strategy is proactive, not reactive. By tackling cleanup, protection, and soil health before the first deep freeze, you create a resilient garden that bounces back with impressive energy in the spring.
Ultimately, this whole process is about turning your garden into a beautiful and functional part of your home all year long. For more inspiration on how to make the most of your exterior, take a look at these creative outdoor living space ideas.
Clearing Out Summer Growth and Debris
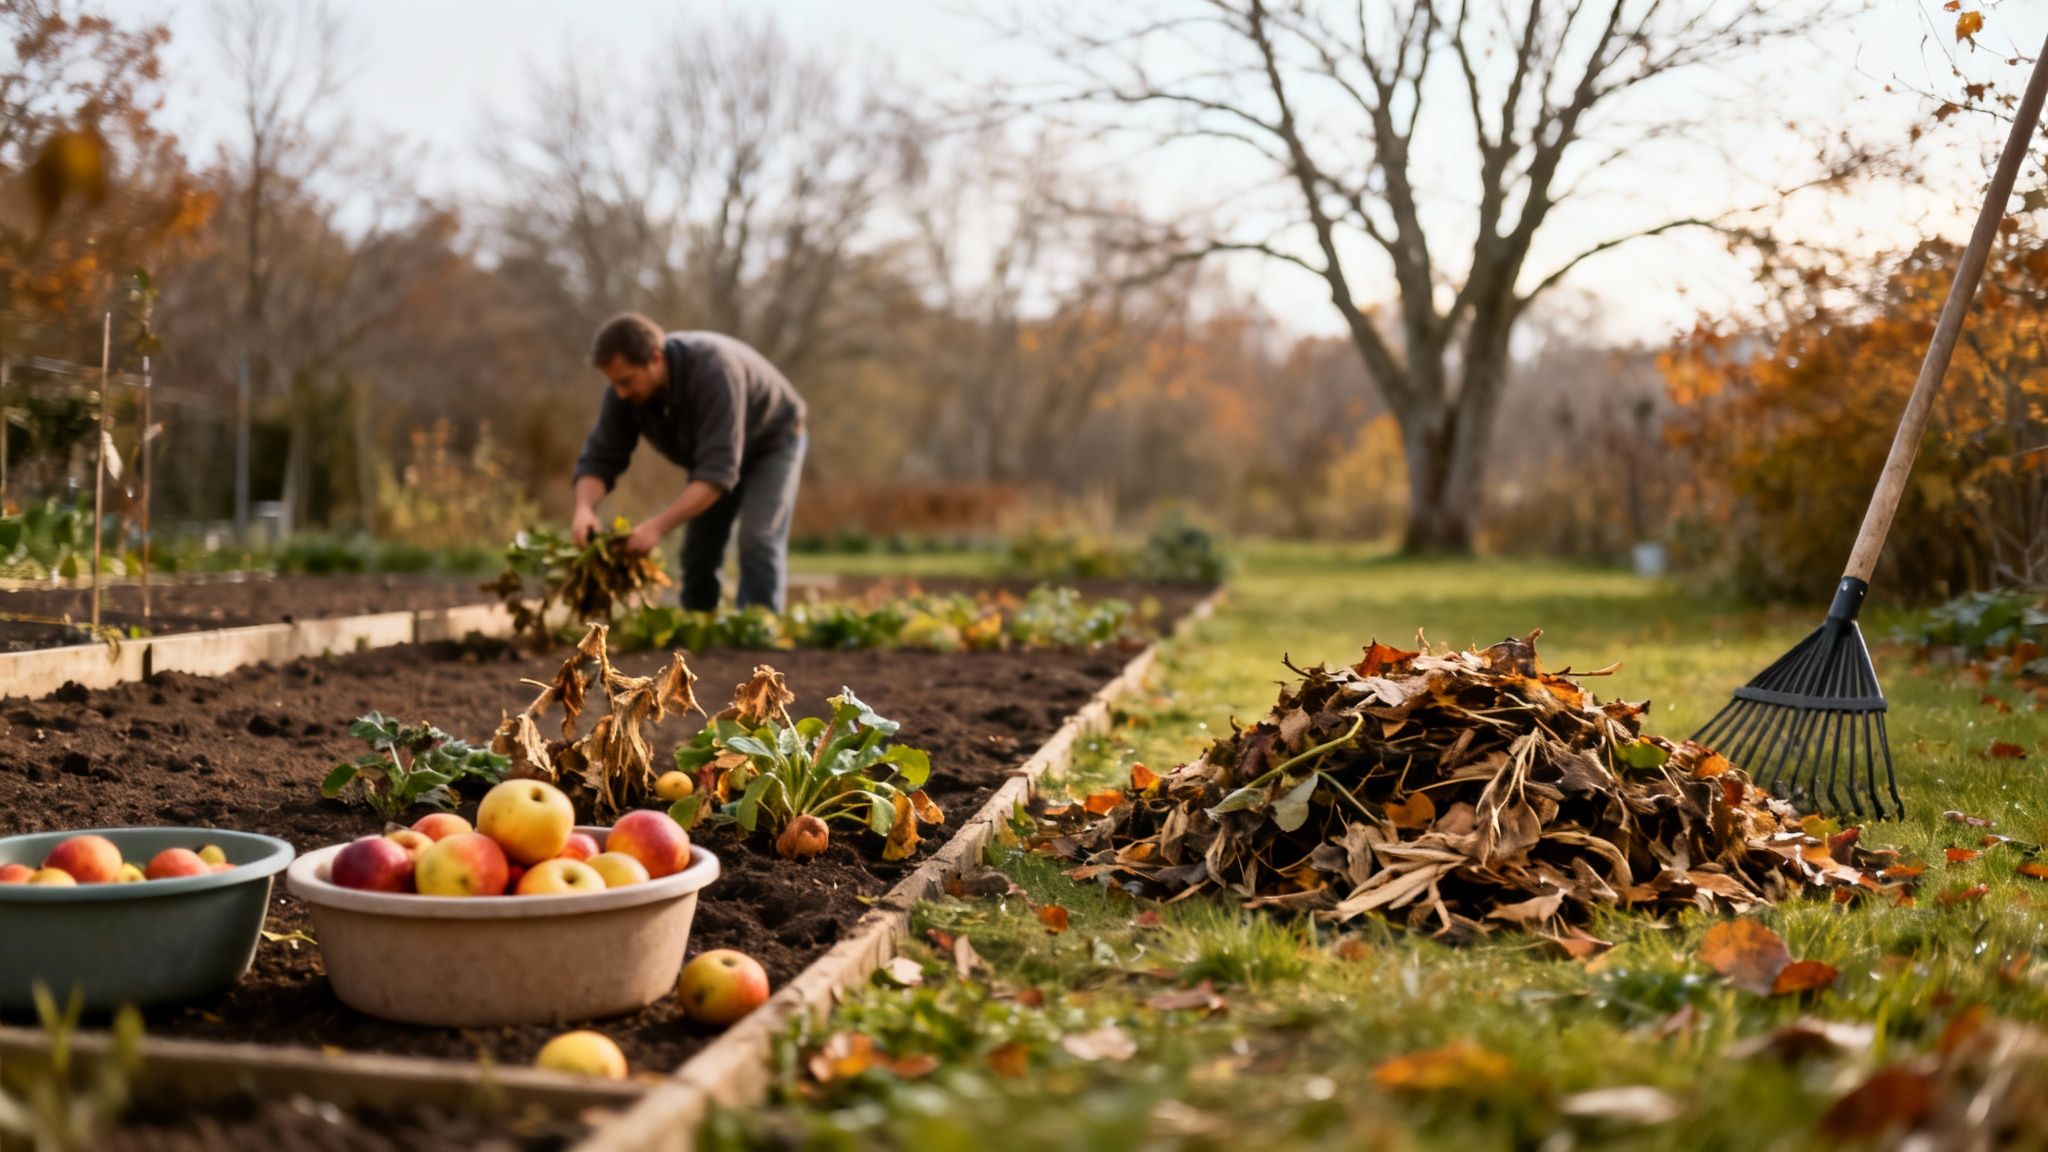
The first real, hands-on job of winterizing your garden is a big cleanup of everything summer left behind. It might feel like a purely cosmetic chore, but trust me, this is your frontline defense against a whole host of pests and diseases looking for a cozy place to ride out the cold. Think of it less as tidying up and more as strategic sanitation.
By getting rid of spent plants, fallen fruit, and diseased leaves, you’re basically evicting troublemakers before they can even unpack. It’s a crucial step that not only protects next year’s garden but also gives you a clean slate for amending your soil and protecting your perennials.
Handling Spent Annuals and Vegetables
Once the first frosts are on the horizon, it’s time to say goodbye to tender annuals and summer veggies that have run their course. Plants like tomatoes, squash, and zinnias just won’t make it through the cold, and leaving them to rot in place is an open invitation for problems.
For any plants that were healthy and disease-free, the “chop and drop” method is a fantastic, low-effort way to give your soil a boost. Just cut the plants at their base, leaving the roots in the ground to decompose, which adds organic matter and improves soil structure. Then, chop the stems and leaves into smaller pieces and spread them over the bed as a first layer of mulch.
This approach is brilliant for recycling nutrients right back where they came from, feeding all the microbial life that will support next year’s plants. But remember, this is only for healthy plant material.
When to Compost and When to Trash
Knowing what to toss in the compost bin versus what needs to go straight in the trash is one of the most critical calls you’ll make all fall. Get this wrong, and you could be reintroducing the same diseases you fought all summer right back into your garden next spring.
Here’s a simple guide to help you sort it out:
- Compost It: Healthy annuals, sturdy stalks from corn and sunflowers, weed-free grass clippings, and fallen leaves are all perfect for the compost bin. They’ll break down over winter and turn into that beautiful, nutrient-rich humus your spring garden will love.
- Trash It: Any plant material showing signs of disease has to be removed from your garden entirely. This means tomato vines with blight, squash plants covered in powdery mildew, or any leaves with a major insect infestation. These pathogens can easily survive in a typical home compost pile.
- Burn or Bag It: For really aggressive diseases like late blight or plants known to harbor stubborn pests, burning (if your local regulations permit) or bagging them up for municipal waste is the safest bet. Never compost diseased tomato or potato foliage. It’s just not worth the risk.
A clean garden bed is a healthy garden bed. Removing potential hosts for fungal spores and insect eggs is one of the most impactful things you can do to ensure a vigorous start next season.
The Final Weeding Session
There are few fall tasks more satisfying than the final, decisive weeding session. Pulling weeds now, after their peak growing season, is so much easier and more effective than waiting until spring when they come back with a vengeance. Many winter annual weeds actually sprout in the fall, grow slowly through the cold months, and then just explode in spring.
By yanking them out now, you stop them from setting seed and launching a full-scale invasion next year. Pay special attention to stubborn perennial weeds and do your best to get the entire root system. A clean, weed-free bed heading into winter means far less competition for your plants when they wake up. It’s a bit of work now that pays off big time in the spring.
Protecting Plants from Frost and Cold
Alright, with your garden beds all cleaned up, it’s time to shift gears to the next critical phase: shielding your plants from the biting cold. Freezing temperatures, harsh winds, and even hungry wildlife can do a real number on the plants you’ve invested so much time and effort in.
A little proactive protection now is the secret to ensuring your favorite plants bounce back healthy and vigorous next spring. This isn’t a one-size-fits-all job, though. Different plants need different strategies, so let’s walk through the best ways to safeguard every corner of your yard, from tender shrubs to your container garden.
To Cut or Not to Cut Perennials
One of the longest-running debates in fall gardening centers on perennials: should you chop them down or let them be? Honestly, there are solid arguments for both, and what you decide to do often comes down to the specific plant and your personal gardening goals.
When to Cut Perennials Back
For any plants that struggled with fungal diseases like powdery mildew—I’m looking at you, peonies, bee balm, and phlox—cutting them back to a few inches above the ground is a smart move. This gets rid of diseased foliage and boosts air circulation, stopping nasty pathogens from overwintering. It also gives your garden a much tidier, manicured appearance through the winter.
Why You Might Leave Perennials Standing
On the flip side, leaving sturdy perennials like echinacea (coneflower), rudbeckia (black-eyed Susan), and ornamental grasses has some major perks.
- Winter Scenery: Their seed heads look absolutely stunning dusted with snow, adding some much-needed texture and structure to an otherwise bare landscape.
- A Buffet for Birds: Our feathered friends, especially finches and chickadees, will happily feast on those seeds all winter long.
- Natural Protection: The standing foliage acts as a natural mulch, catching leaves and snow that insulate the plant’s crown from the cold.
A good compromise I’ve found is to cut back any diseased or weak-stemmed plants and leave the sturdy, beneficial ones standing until early spring.
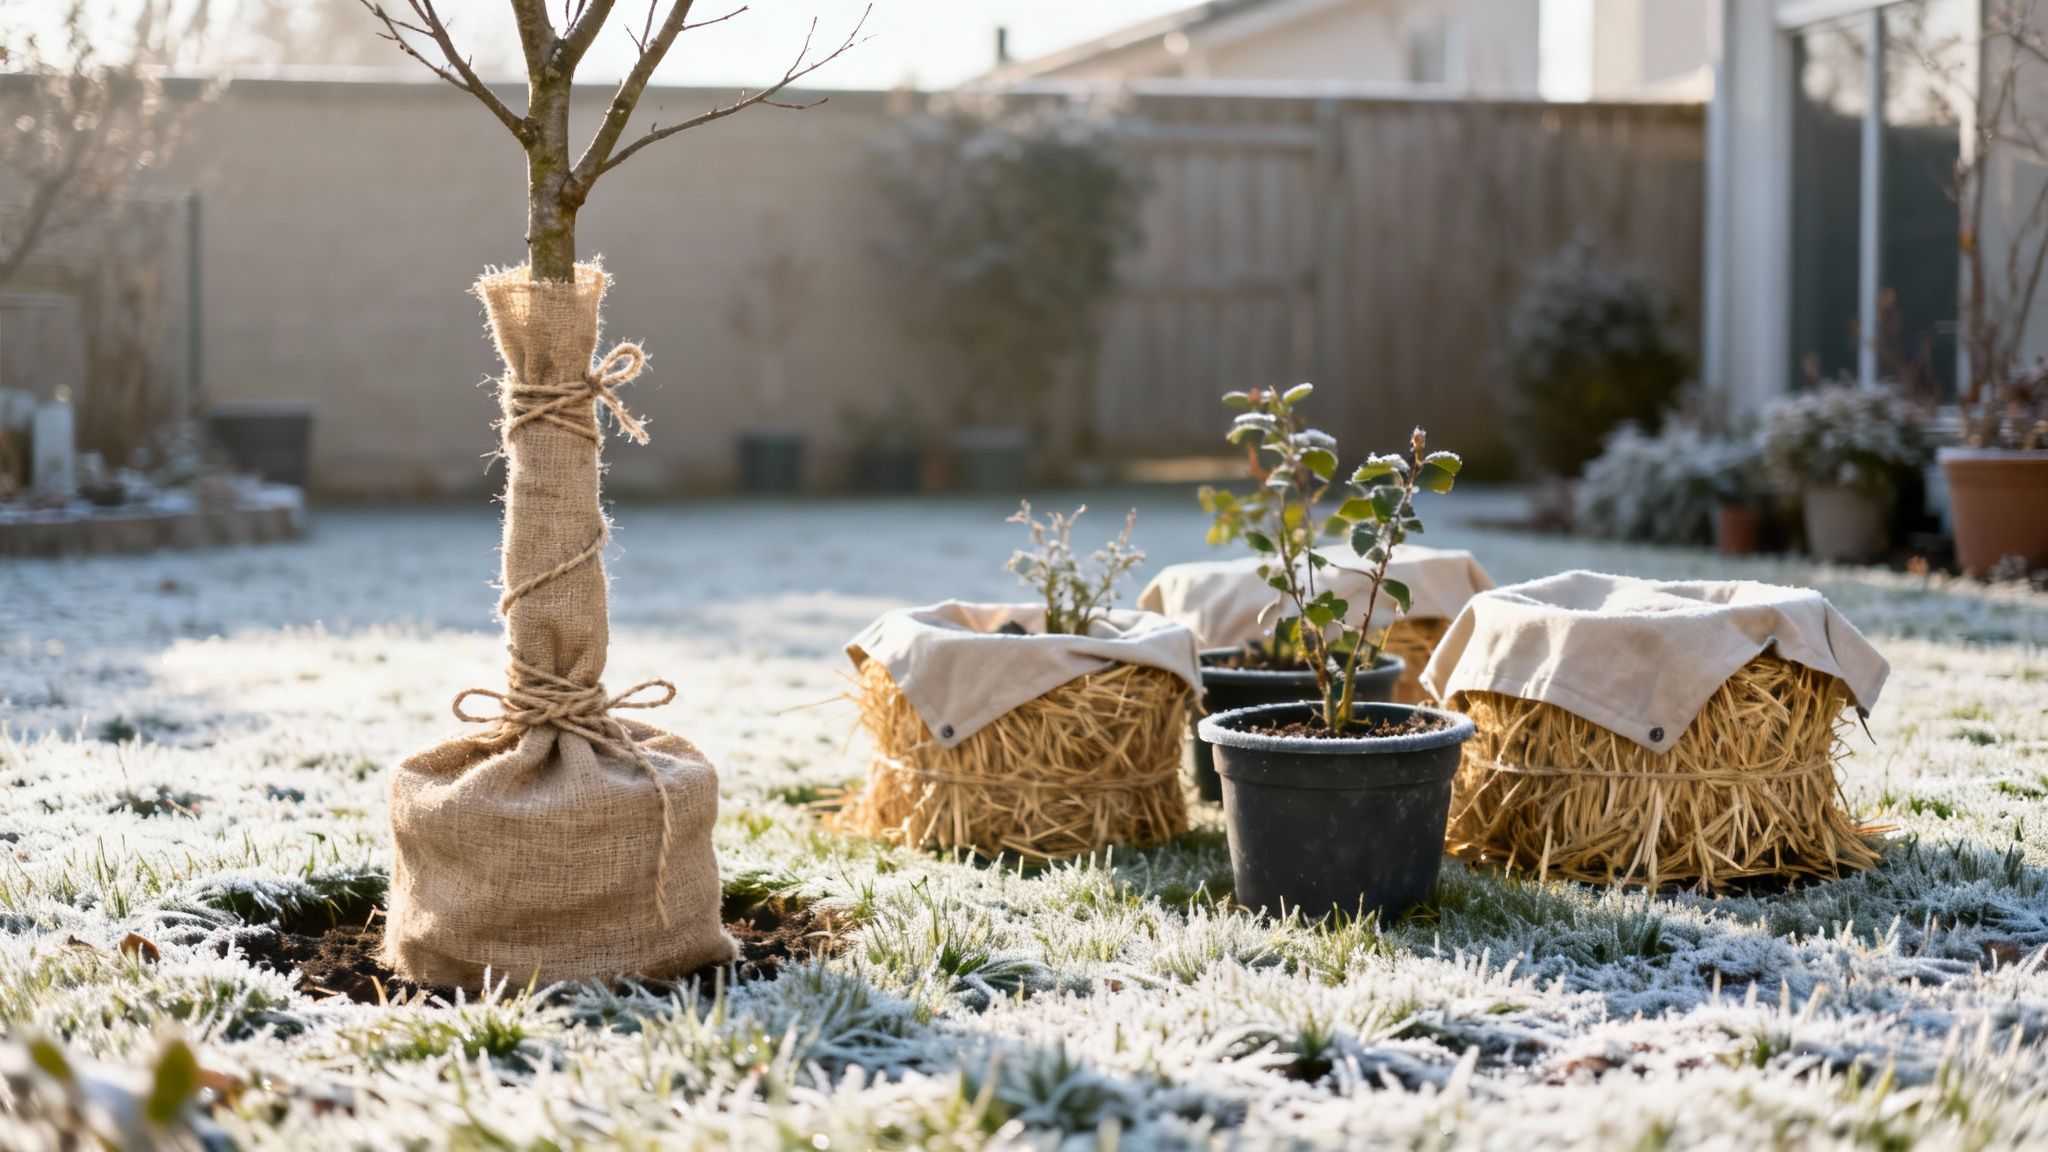
Shielding Trees and Shrubs from Winter Damage
Young trees and more delicate shrubs are especially vulnerable during winter. Their thin bark can suffer from sunscald, a condition where the winter sun warms the bark on a cold day, only for it to crack when temperatures plummet at night. Hungry animals can also be a real problem.
Wrapping the trunks of young trees (especially fruit trees) with commercial tree wrap or even light-colored fabric is a fantastic way to prevent sunscald. Just start at the base and wrap your way up, overlapping each layer by about a third.
For tender shrubs like roses or certain hydrangeas in colder zones, building a protective barrier is the way to go. You can drive a few stakes into the ground around the plant and wrap them with burlap, making sure to leave the top open for air to circulate. Filling that little enclosure with shredded leaves gives it incredible insulation against freezing winds.
Pro Tip: Don’t forget about hungry critters! Rabbits and voles love to chew on the bark of young trees and shrubs when other food sources are scarce. A simple plastic tree guard installed around the base of the trunk is an easy and effective way to stop them.
Managing Container Plants and Potted Gardens
Plants in containers are way more exposed to the cold than their in-ground counterparts. The soil in a pot can freeze solid, which is a death sentence for the roots. How you protect them really depends on the plant and the pot itself.
Bringing Plants Indoors
Any tender perennials and tropicals you want to save, like geraniums or fuchsias, need to come inside before the first hard frost hits.
- Pest Check: Give them a thorough inspection for any insects hiding on the leaves or in the soil.
- Give Them a Trim: Prune the plant back by about a third. This reduces its size and helps encourage dormancy.
- Reverse Hardening Off: Acclimate the plant to lower light by moving it to a shady spot for a week before bringing it all the way indoors.
- Find a Cool, Bright Spot: An unheated garage with a window or a cool basement usually works perfectly. Water them just enough to keep the soil from drying out completely.
Protecting Pots You Leave Outside
For hardy perennials or shrubs in containers, you can often leave them outdoors with a bit of protection. Grouping pots together against a sheltered wall of your house helps reduce their exposure. I also like to wrap the pots in bubble wrap or burlap and pile mulch around the base for extra root insulation.
Just be aware that ceramic and terra cotta pots are notorious for cracking as the moist soil inside freezes and expands. If you can, move these more fragile containers into a shed or garage to make sure they survive the winter.
Timing is everything here. Getting plants ready for the first frost is crucial, with mid-October being a common target for Zones 5-7, which covers a huge swath from the Midwest to the Northeast. This is also the perfect time to sow crops like garlic for a harvest next July, or kale, which can handle temperatures down to 0°F. You can learn more about how timing and proper watering help a winter garden survive by checking out this great advice on seasonal garden care from Rain Bird.
Enriching Your Soil for Next Season
With your garden beds cleared out and the plants tucked in, it’s time to focus on the real foundation of next year’s success: the soil. Honestly, this might be the single most important part of the whole winter prep process. I like to think of the dormant winter months not as an ending, but as a long, slow marination period for my garden beds.
What you do now directly sets the stage for the health, structure, and fertility of your soil next spring. By adding good organic matter and a protective blanket of mulch, you’re creating the perfect environment for beneficial microbes to do their magic all winter long. It guarantees your plants will have a nutrient-rich, crumbly foundation to sink their roots into when the growing season kicks off again.
Amending the Soil with Organic Matter
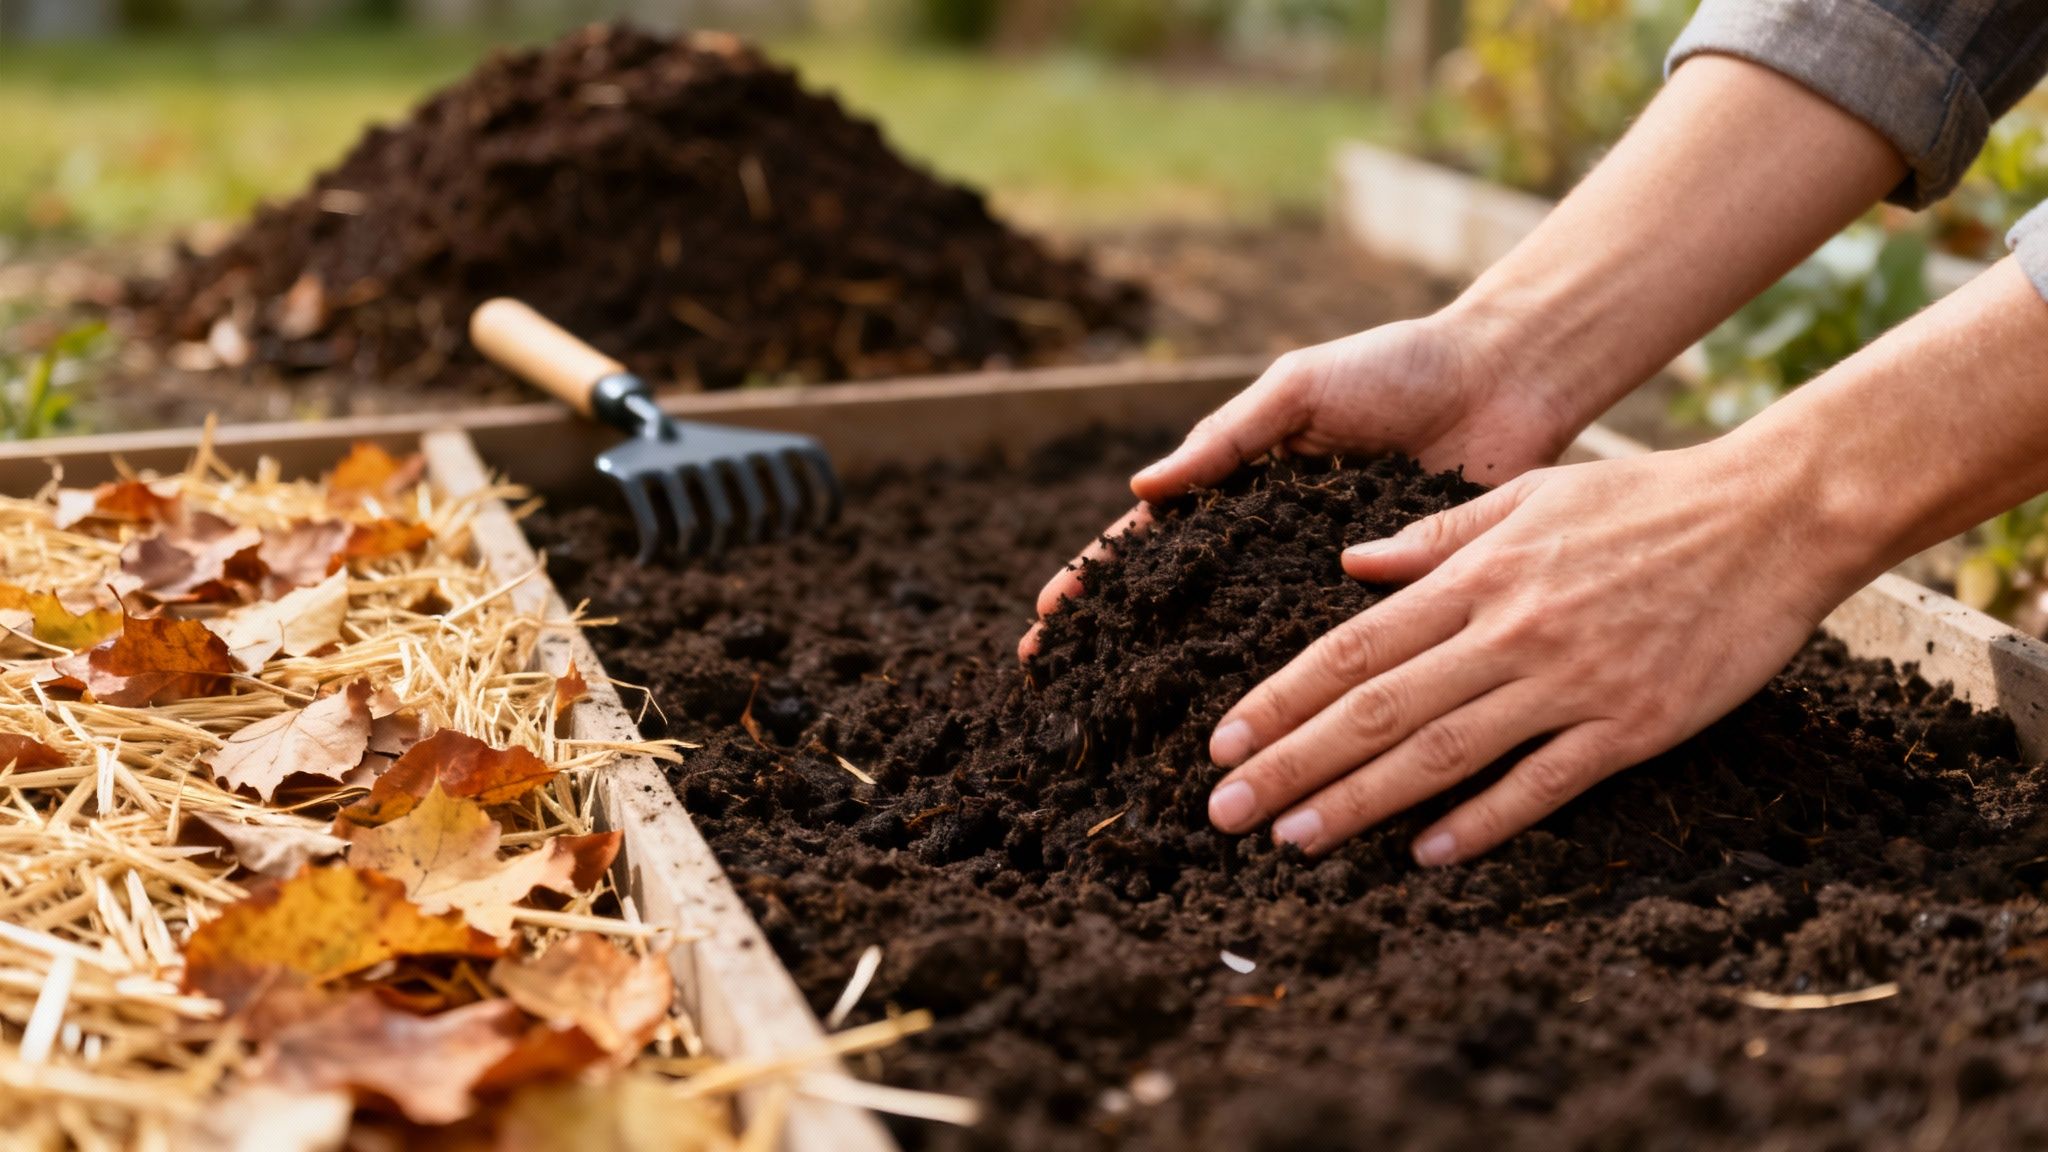
Fall is, without a doubt, the absolute best time to feed your soil. After a long, productive season, your garden beds are tired and depleted of key nutrients. Adding a rich layer of organic matter now gives it several months to break down and integrate, a slow-and-steady process that’s far more effective than a rushed application in the spring.
I just spread a two to three-inch layer of well-rotted compost or aged manure over my empty vegetable and annual beds. This infusion of organic material improves soil structure like nothing else, helps it hold water, and provides a slow-release feast for the earthworms and microorganisms that are the true lifeblood of a healthy garden. You don’t even have to till it in; just lay it on top and let winter’s moisture and biological activity do the heavy lifting for you.
Choosing the Right Soil Amendments
Not all organic matter is created equal, and what you choose should match what your garden really needs.
- Compost: This is the universal soil conditioner. It’s balanced, teeming with microbial life, and improves the texture of both heavy clay and loose sandy soils. Your own homemade compost is the gold standard, but high-quality bagged compost works wonderfully, too.
- Aged Manure: If you have heavy-feeding vegetables, this is your ticket. It provides a significant nitrogen boost they’ll love. Just make absolutely sure it’s well-rotted—fresh manure is too “hot” and will burn plant roots.
- Shredded Leaves: Nature’s free gift! Decomposed leaves, or leaf mold, create a phenomenal, fungus-rich soil amendment. It dramatically improves soil structure and its ability to retain moisture.
Key Insight: Amending your soil in the fall is like making a slow-cooker meal for your garden. The ingredients—compost, manure, and leaves—simmer all winter, resulting in perfectly fertile soil by springtime.
The Crucial Role of Winter Mulch
Once your soil is fed, the next move is to tuck it in under a cozy blanket of mulch. Applying mulch in late fall is less about warming the soil and more about keeping it at a consistent temperature. This is vital. It prevents the damaging freeze-thaw cycles that can heave the roots of dormant perennials right out of the ground.
The ideal time to apply winter mulch is after the first hard frost, once the top inch or two of soil has frozen solid. If you apply it too early, you can trap warmth, which delays plant dormancy and, worse, provides a cozy winter hideout for rodents and other pests. A thick layer of mulch also acts as a shield against soil erosion from harsh winter winds and rain, suppresses a surprising number of winter weeds, and conserves moisture.
Effective winter prep relies heavily on good mulching to protect the soil. When snow is present, it can conserve up to 90 percent of moisture during dry autumns. Applying 3-6 inches of organic mulch like shredded bark or straw over perennial beds after the ground freezes (around 32°F) helps lock in that moisture and suppress weeds. According to university extension studies, this simple step can reduce winter plant loss by 40-50 percent. This is also the perfect time to test soil pH—aim for a 6.0-7.0 range—and amend with compost to boost the microbial activity that continues slowly under the snow. For more details, check out these insights on seasonal soil care from the University of Illinois Extension.
Practical Mulching Tips
Applying mulch correctly is simple, but getting it right makes a huge difference.
- Use What You Have: Fallen leaves are a perfect, free mulch source. My trick is to run over a pile of them with the lawnmower a few times to shred them. This keeps them from forming a dense, water-repellent mat.
- Apply a Thick Layer: Don’t be shy with it. Aim for a layer that’s at least three to four inches deep. This provides the insulation and weed suppression you’re looking for.
- Keep Clear of Plant Crowns: When mulching around your perennials, trees, or shrubs, make sure to leave a few inches of space around the base of the stems or trunk. Piling mulch directly against the plant is an invitation for rot.
Prepping Your Gear: Tools and Irrigation Winterizing
As the garden winds down, it’s easy to forget about the hardware that did all the heavy lifting. But now is the perfect time to turn your attention to your tools and watering systems. Taking an hour or so for proper winterizing is one of the smartest, most cost-effective things you can do—it prevents rust, stops decay, and saves you from the headache of costly repairs from frozen, burst pipes come spring.
This isn’t just about giving things a quick rinse and tossing them in the shed. Think of it as a crucial maintenance routine that will dramatically extend the life of your gear. Clean, sharp, and well-oiled tools are not only safer but far more effective, meaning you can jump right back into spring planting without any frustrating delays.
A Practical Checklist for Tool Maintenance
After a long season of digging, cutting, and weeding, your tools have earned a little TLC. Dirt and moisture are the biggest enemies of metal and wood, leading to rust and rot if you don’t step in. A simple, methodical approach now pays off big time later.
First up, gather all your hand tools—trowels, shovels, pruners, you name it. Grab a stiff brush and some water and scrub off every bit of caked-on soil. For that stubborn, sticky sap on your pruners or loppers, a little rubbing alcohol on a rag works wonders.
Once they’re sparkling clean and completely dry, it’s time to sharpen and oil.
- Sharpen Those Edges: Use a good quality file or a sharpening stone to put a clean, sharp edge back on your shovels, hoes, and pruner blades. A sharp tool makes every gardening task feel less like a chore.
- Oil and Protect: Wipe down all the metal surfaces with a lightly oiled rag. A product like linseed oil or even a quick spray of WD-40 creates a protective barrier against moisture, stopping rust before it can even think about forming over the damp winter.
- Care for Wooden Handles: Don’t forget the handles! Sand down any splinters that have appeared over the season and give them a good rubdown with linseed oil. This simple step keeps the wood from drying out and cracking, ensuring they stay strong and comfortable in your hands for years.
Properly storing your equipment ensures it’s ready to go the moment you need it. To explore a curated list of essential items, check out our guide on the must-have garden tools for every home.
Securing Your Irrigation Systems
Water left in hoses, pipes, or sprinkler systems is a ticking time bomb. When water freezes, it expands with incredible force—more than enough to split a thick rubber hose or crack a PVC pipe right open. Winterizing your irrigation isn’t optional; it’s a critical step to avoid a messy and expensive surprise in the spring.
The exact process depends on your setup, from simple garden hoses to complex in-ground sprinklers. The core principle, however, is always the same: get the water out.
Crucial Reminder: A single hard freeze is all it takes to cause permanent damage to your watering equipment. Don’t put this off—make it a priority as soon as you see freezing temperatures in the forecast.
For garden hoses, it’s pretty straightforward. Disconnect them from the spigot, drain them completely by laying them out on a slight slope, and then coil them up for storage in a garage or shed. Leaving a hose connected can actually trap water in the faucet itself, potentially causing the pipe inside your wall to burst.
Winterizing Drip and Sprinkler Systems
In-ground sprinkler and drip irrigation systems need a more thorough approach to make sure they are completely clear of water.
- Shut Off the Water: The very first thing to do is find and turn off the main water supply valve for your irrigation system.
- Drain the Lines: Many systems have manual drain valves located at their lowest points. Open these up and let gravity do the work of pulling the water out.
- Blow Out with Compressed Air: For total peace of mind, especially in climates that see a deep freeze, “blowing out” the lines with an air compressor is the gold standard. This forces every last drop of water out of the pipes, sprinkler heads, and valves.
If you’re not comfortable handling an air compressor, this is a service many local landscaping companies are happy to provide. It’s a small price to pay for the assurance that your system will be intact and ready to go next spring.
Got Questions About Winter Garden Prep?
Even with the best checklist, there are always a few lingering questions that pop up when you’re tucking the garden in for winter. Let’s dig into some of the most common ones I hear from gardeners, so you can finish your fall cleanup with confidence.
Should I Just Leave the Fallen Leaves on My Lawn?
Ah, the classic autumn debate. While a light dusting of finely shredded leaves can be a decent natural fertilizer for your lawn, letting a thick blanket of whole leaves sit there all winter is a big no-no.
Think of it like this: that dense mat smothers your grass, blocking out the sun and air it needs to survive. Worse, it traps moisture and creates the perfect damp, matted breeding ground for fungal diseases like snow mold. Come spring, you’ll be staring at ugly dead patches.
Here’s what I recommend:
- Rake and Compost Them: This is the gold standard. Rake up those leaves and toss them in your compost pile. They’ll break down into “black gold” for your garden next year.
- Mow Them into Mulch: If you’re short on time, just run your lawnmower over the leaves a few times. The shredded bits will fall down between the grass blades, decompose over the winter, and feed the soil without harming the turf.
When Is the Right Time to Add Winter Mulch?
This is where timing is absolutely critical. The point of winter mulch isn’t to keep the ground warm—it’s to keep it consistently frozen. This prevents the destructive freeze-thaw cycles that can literally push plants up and out of the soil, a phenomenon called “heaving.”
The sweet spot for applying your mulch is after the first hard frost has frozen the top inch or two of soil.
If you jump the gun and mulch too early while the ground is still warm, you’re asking for trouble. For one, you might trick your plants into delaying their natural dormancy, leaving them vulnerable to a sudden deep freeze. Secondly, a warm, insulated layer of mulch is like putting out a welcome mat for rodents looking for a five-star winter resort to nest in.
Does My Garden Really Need Water in the Winter?
It sounds a bit strange, but in many climates, the answer is a definite yes. Evergreen trees and shrubs are especially at risk for something called winter desiccation.
This happens when dry winter winds suck moisture out of their needles or leaves, but the frozen ground prevents the roots from soaking up any water to replace it. The result is significant browning and dieback that you won’t see until spring.
If you live somewhere with dry winters and spotty snow cover, do your evergreens a favor and give them a deep, thorough watering before the ground freezes solid. A good long soak in late fall can make all the difference. You might even need to water again during any surprise mild, dry spells during the winter months.
What Do I Do with My Rain Barrels?
Leaving a rain barrel full—or even partially full—of water over the winter is a recipe for a cracked, useless piece of plastic come springtime. As water freezes, it expands with incredible force, and it will have no problem splitting your barrel right open, no matter how tough it seems.
You absolutely have to drain your rain barrels completely before the first hard freeze rolls in.
Once it’s empty, disconnect the barrel from the downspout, give it a quick rinse to clear out any gunk, and store it upside down somewhere sheltered. A garage, shed, or even under a deck works perfectly. This simple step keeps stray water from collecting and freezing inside, ensuring your barrel is ready to go next season.
While you’re getting your outdoor space ready for the cold, you might be thinking about how to still enjoy it. For some great ideas on creating a warm and inviting spot, check out our guide on finding the best fire pit for your patio.
For more in-depth, conversational guides on the best products for your kitchen, garden, and home, explore the resources at Reva Housing. We help you turn research into confident, well-informed purchases. Learn more at https://revahousing.com.