


Let’s be honest, a good vent hood is one of the most underrated upgrades you can make to your kitchen. It’s the kind of project that completely changes how you feel about cooking at home. It gets rid of smoke, lingering food smells, and that annoying film of grease that settles on everything, which means better air and a cleaner space. For a determined DIYer, this is a weekend project that pays off for years to come.
Why a Vent Hood Is a Non-Negotiable Kitchen Upgrade
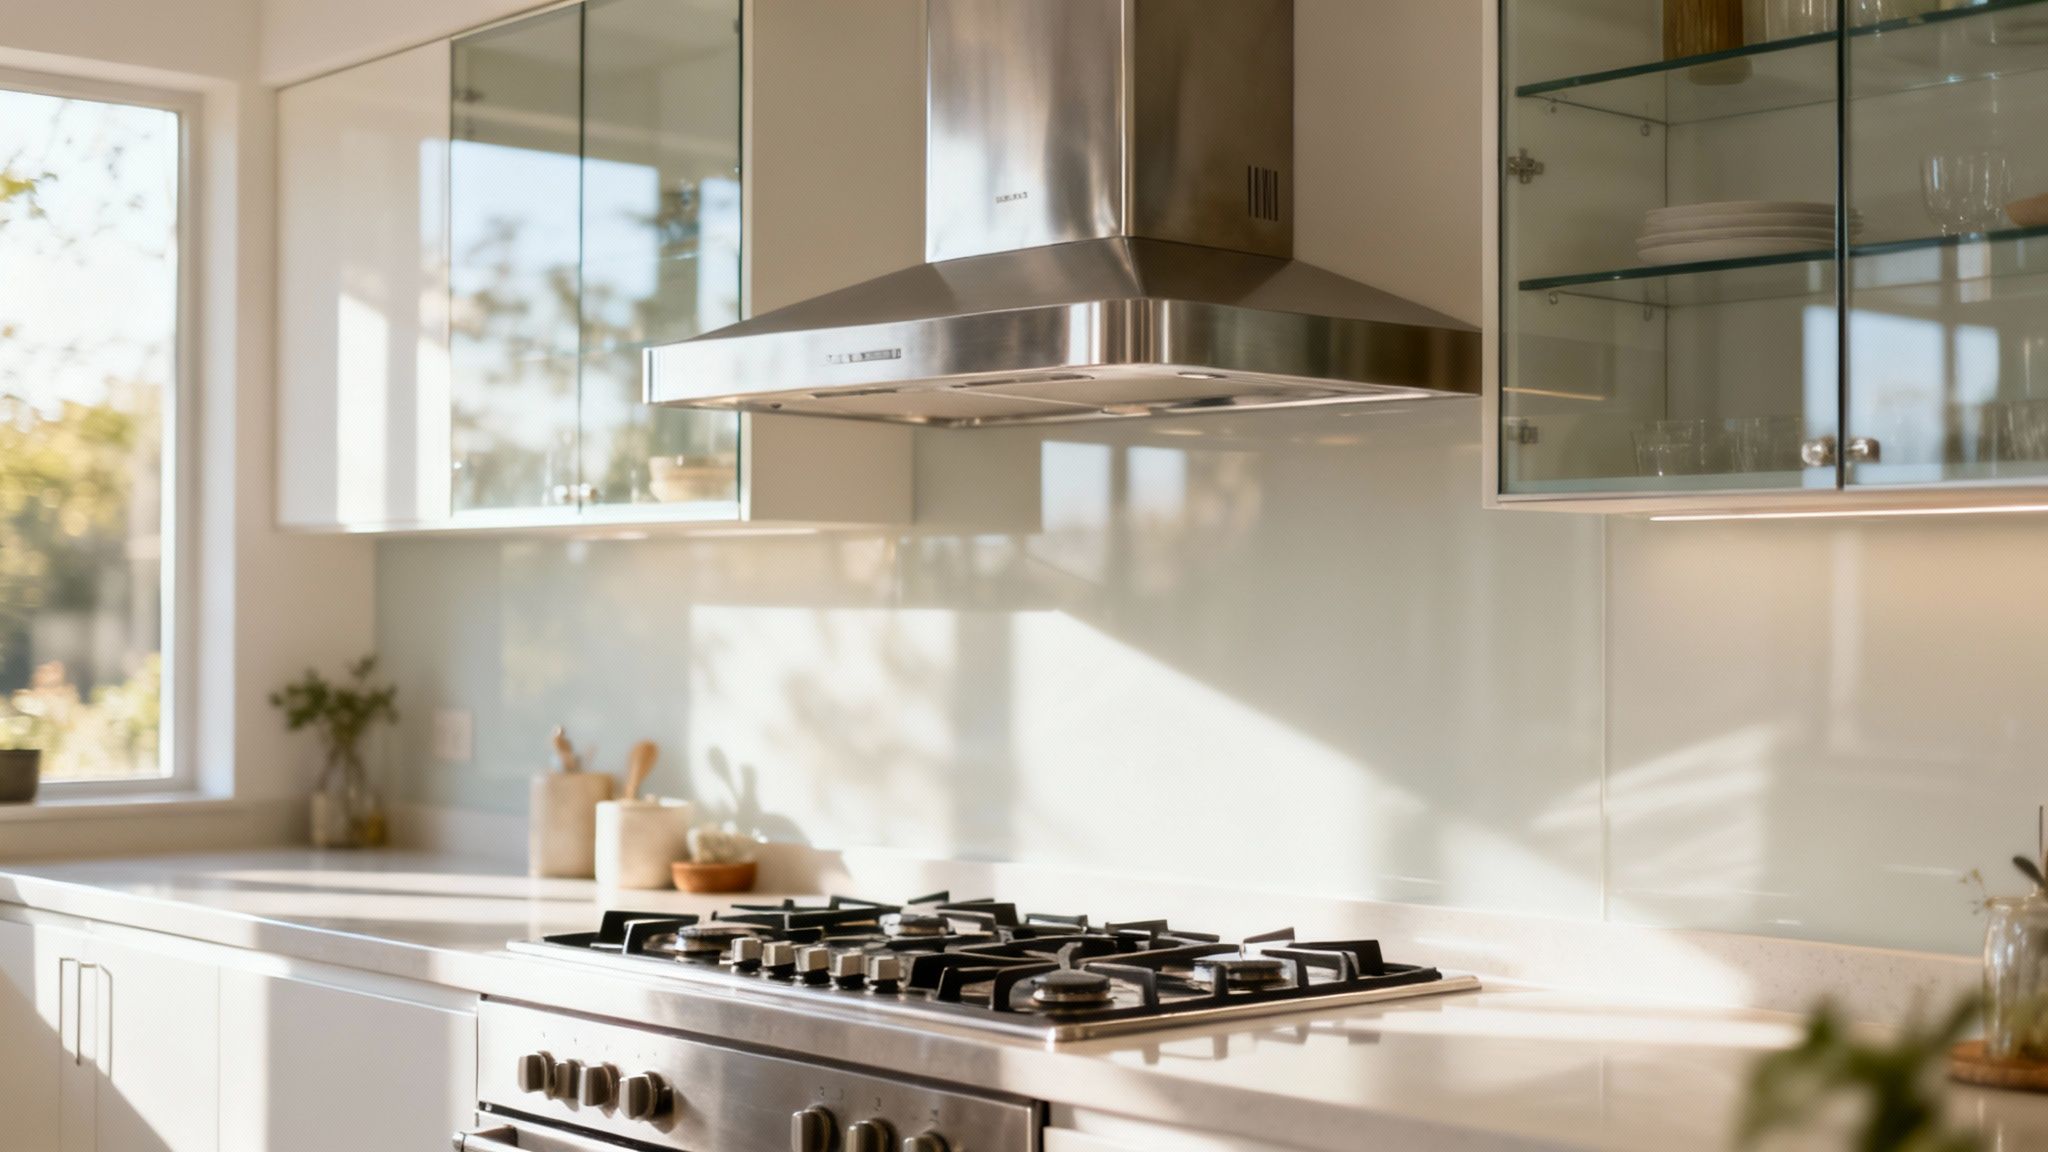
Are you tired of that greasy film that seems to coat every surface after you cook? Do you find yourself cracking a window in the middle of winter just to air out the smell of last night’s fish tacos? If that sounds familiar, you’re not alone. A quality kitchen vent hood is the answer, and it’s so much more than just a noisy fan.
Think of it as your kitchen’s dedicated air purifier. Its main job is to grab airborne grease, smoke, steam, and cooking odors right at the source—your stovetop—before they have a chance to wander through your house. This one simple function has some seriously powerful benefits that make a vent hood a must-have for any modern kitchen.
The Real-World Impact on Your Home
Beyond just clearing the air after you sear a steak, a properly installed vent hood has a real, tangible impact on your home. It dramatically cuts down on the amount of grease particles that land on your cabinets, walls, and ceilings. Over time, that greasy buildup can actually discolor your paint and finishes, making your kitchen look dingy and dated. If you’re planning a cabinet refresh, our guide on the best cabinet paint can help you get a finish that lasts.
The health benefits are a big deal, too. Good ventilation is a cornerstone of healthy indoor air quality, and the kitchen is often ground zero for pollutants.
A modern vent hood isn’t just an appliance; it’s a fundamental part of a clean, healthy, and functional kitchen. By capturing pollutants right at the source, it directly protects your home’s surfaces and your family’s well-being.
What the Trends Tell Us
The growing popularity of vent hoods tells the story. The global market for them is already huge, sitting at USD 13,104.30 million, and it’s expected to climb to an incredible USD 19,964.43 million by 2035.
This boom is driven by a much bigger focus on indoor air quality. It turns out that poor kitchen ventilation can lead to a 30% higher risk of respiratory issues. It’s no surprise that under-cabinet hoods are leading the charge, holding a 41.42% market share, largely because they’re one of the most straightforward styles to install. These kitchen hood market trends show just how essential this upgrade has become.
Choosing the Right Vent Hood for Your Kitchen
Before you start marking up walls or flipping circuit breakers, you have to nail the most important decision of the entire project: picking the right vent hood. This single choice will define the installation’s complexity, your final budget, and ultimately, how fresh your kitchen air stays. Get this part right, and everything that follows gets a whole lot easier.
The first major fork in the road is the classic ducted versus ductless debate. This isn’t just about what looks good; it’s a practical decision dictated by your home’s layout and your cooking style.
Ducted vs. Ductless: The Great Debate
A ducted vent hood is the heavyweight champion of ventilation. It works by physically pulling smoke, steam, and greasy air out of your kitchen and pushing it completely outside through a network of ducts. If you do a lot of high-heat cooking—think searing steaks, frying, or using a wok—a ducted system is hands-down the best way to keep your indoor air quality pristine.
On the other side of the ring is the ductless (or recirculating) hood, the master of convenience. Instead of venting air outside, it draws it through a set of filters—usually a mesh filter for grease and a charcoal one for odors—before releasing the cleaned air right back into the kitchen. This makes for a much simpler installation, especially in apartments, condos, or homes where running new ductwork is either impossible or just not practical.
To make it easier to see the differences at a glance, here’s a quick breakdown.
Ducted vs. Ductless Vent Hoods Key Differences
| Feature | Ducted Vent Hood | Ductless (Recirculating) Vent Hood |
|---|---|---|
| Air Removal | Vents smoke, steam, & odors completely outside | Filters & recirculates air back into the kitchen |
| Effectiveness | Superior for removing heat, moisture, & pollutants | Good for odors & grease, but doesn’t remove heat |
| Installation | More complex & costly; requires ductwork | Simpler & more affordable; no ductwork needed |
| Best For | Heavy-duty cooking (frying, searing), gas stoves | Renters, apartments, kitchens where ducting is impossible |
| Maintenance | Ducts may need occasional cleaning | Filters must be cleaned/replaced regularly |
Ultimately, a ducted hood will always perform better, but a ductless model is a fantastic, accessible solution when venting outside isn’t an option.
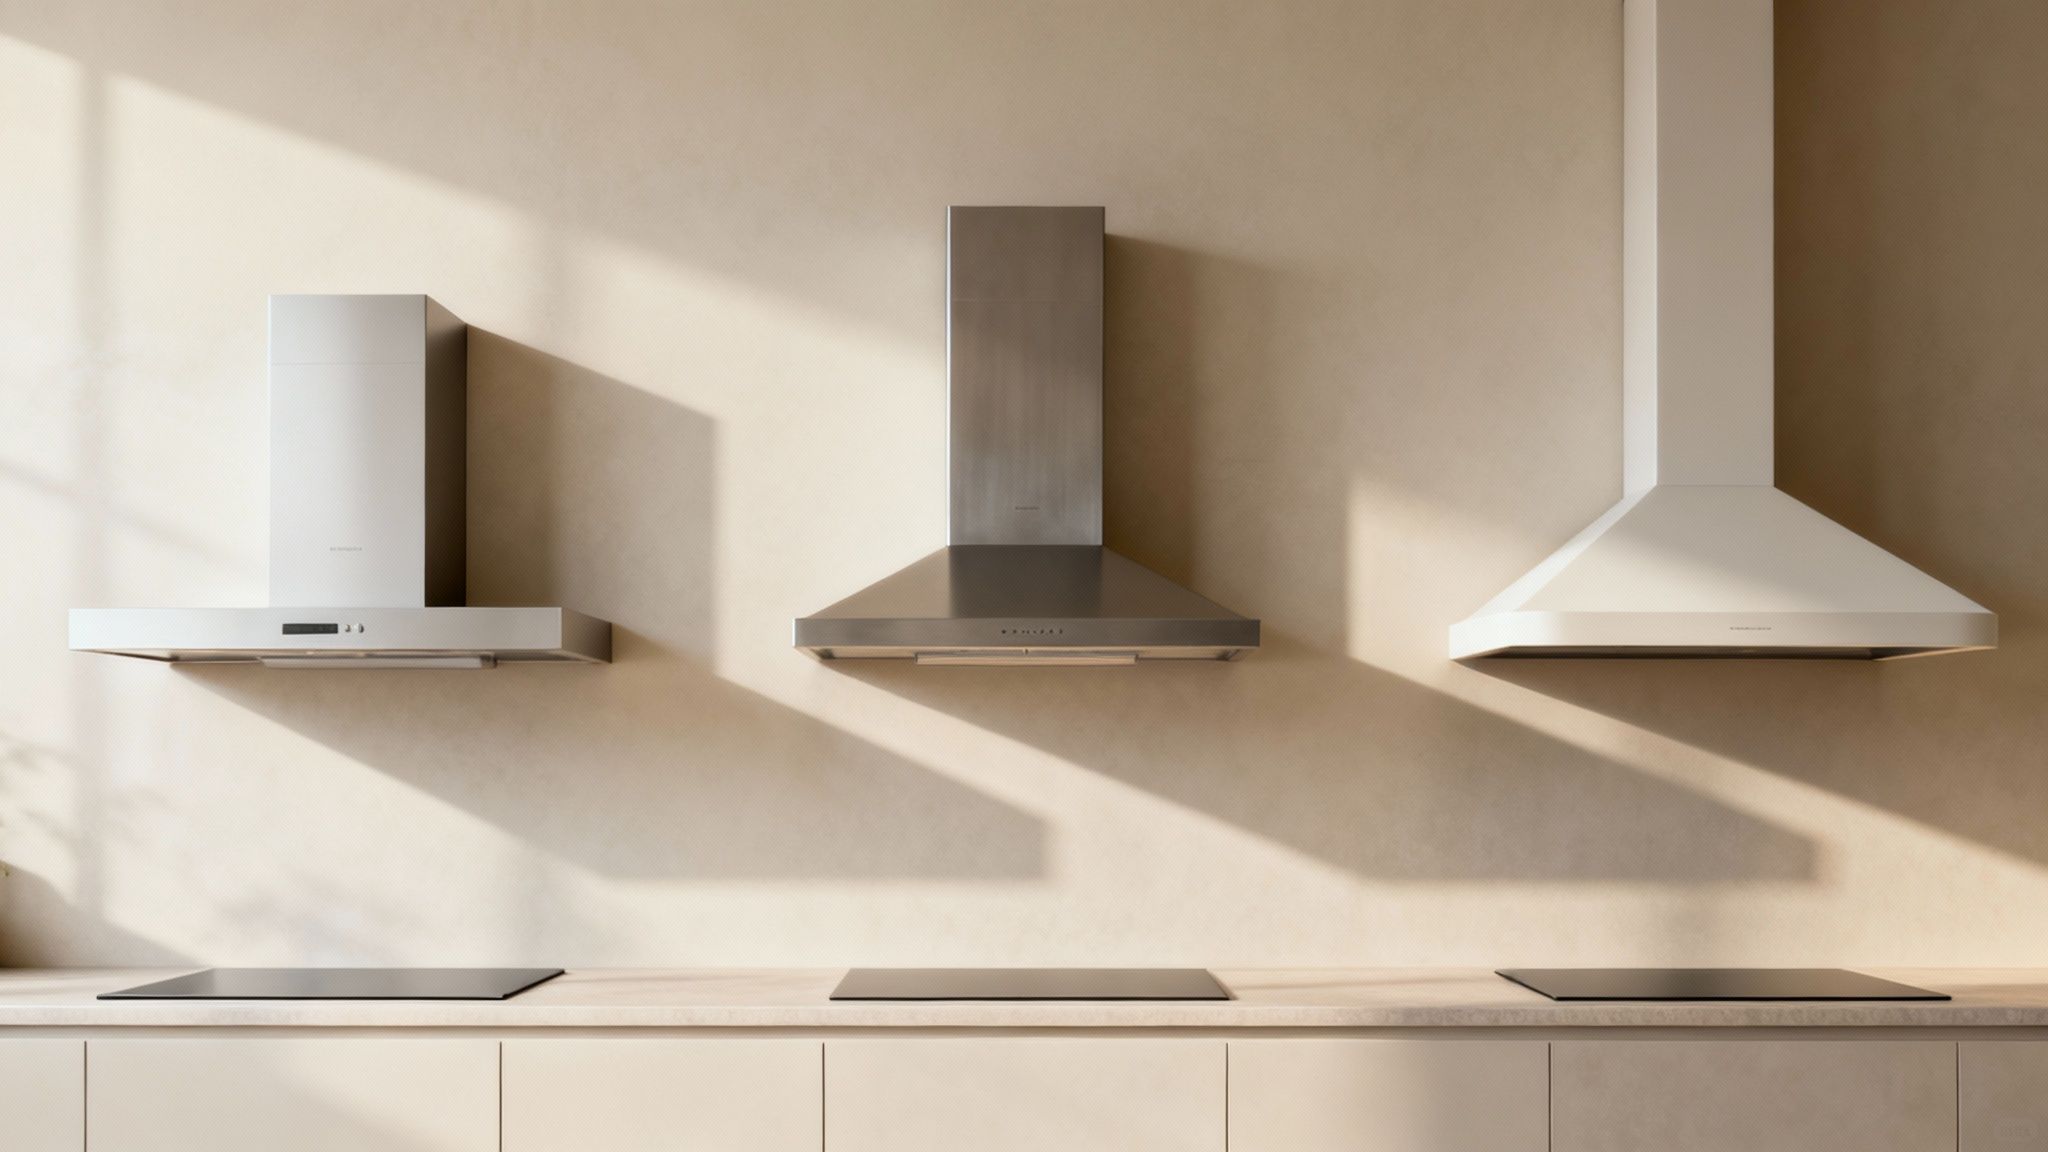
Finding Your Style and Power Level
Once you’ve landed on ducted or ductless, it’s time to think about style and how it fits your kitchen’s design. You’ll generally run into three main types:
- Under-Cabinet Hoods: These are the most common and often the easiest to install since they mount directly under your existing upper cabinets. They’re a perfect replacement for an old over-the-range microwave.
- Wall-Mount Hoods: Designed to be a statement piece, these hoods attach directly to the wall in spaces where there are no cabinets over the range. They often have a chimney-style flue that reaches the ceiling, giving your kitchen a professional, polished look.
- Island (or Ceiling-Mount) Hoods: If your cooktop is built into a kitchen island, this is the one for you. These hang from the ceiling and are finished on all four sides, which usually means a more involved installation.
Beyond looks, you have to consider power, which is measured in CFM (Cubic Feet per Minute). This number tells you exactly how much air the fan can move.
Pro Tip: Resist the urge to just buy the highest CFM you can find. An overpowered hood will be incredibly loud and waste energy. The real goal is to match the hood’s power to your stove’s output and the size of your kitchen.
A good rule of thumb for a gas range is to have 100 CFM for every 10,000 BTUs your cooktop puts out. For a standard electric stove, a hood in the 300-600 CFM range is usually more than enough for the average home cook. Making the right choice is critical, and if you happen to be upgrading other appliances at the same time, our kitchen appliance buying guide can help you coordinate everything for a space that works and looks great.
Getting Your Toolkit and Workspace Ready
Ask any pro, and they’ll tell you that a smooth vent hood installation is 90% prep work and only 10% actual installation. Before you even think about cracking open that box, take a little time to gather your tools and get your kitchen ready. It’s the difference between a frustrating afternoon of scrambling and a project that goes off without a hitch.
Think of it like cooking a good meal—you wouldn’t start without having all your ingredients measured and ready. Same principle applies here. Getting everything within arm’s reach lets you stay in the zone.
The Essential Tools for the Job
While every kitchen and hood model has its quirks, this basic toolkit will get you through most installations. You probably have most of this stuff lying around, but it never hurts to do a quick check.
- For Measuring & Marking: A solid tape measure, a good carpenter’s level (a 24-incher is great), and a pencil are your must-haves for getting the placement just right. Pro tip: grab a roll of painter’s tape. It’s perfect for marking drilling spots on cabinets or walls without leaving a mark.
- For Drilling & Fastening: You’ll absolutely need a reliable power drill and a versatile set of bits. A stud finder is your best friend here—you want to anchor this thing into solid wood, not just drywall.
- For Cutting: Depending on where your hood is going, you might need a sharp utility knife to slice through drywall or a jigsaw to make a clean cut in a cabinet. If you’re installing new ducts, a pair of tin snips is non-negotiable for trimming them to the perfect length.
- For Safety: Don’t skip this. Grab your safety glasses, a pair of decent work gloves, and a sturdy step ladder you can trust.
Prepping Your Workspace for a Safe, Clean Install
Once your tools are lined up, it’s time to prep the kitchen itself. This isn’t just about being tidy; it’s about protecting your home and yourself from damage and injury. I’ve seen people rush this part, and it almost always ends in a scratched cooktop or a bigger headache than necessary.
First things first: kill the power. Head to your circuit breaker and flip the breaker for your stove and any old over-the-range fan or microwave. Don’t just assume it’s off—try to turn on the appliance you’re about to remove to be 100% sure.
Safety First: Always Double-Check the Power
Seriously, never just trust the breaker. After you disconnect the old wiring, use a simple voltage tester on the wires to confirm the circuit is dead. This takes five seconds and could save you from a nasty shock.
Next, cover your cooktop. Throw a thick blanket, some cardboard, or a moving pad over the entire surface. This is your insurance policy against a dropped screwdriver or the corner of the new hood. Do the same for any nearby countertops.
Finally, give yourself room to work. Move the toaster, the coffee maker, and anything else off the counters. A clear workspace is a safe workspace. Getting this prep done now means that when it’s go-time, you can focus on one thing: getting that vent hood installed properly.
A Practical Walkthrough of the Installation Process
With your workspace prepped and tools at the ready, it’s time to tackle the main event. Installing a vent hood might seem like a huge job, but when you break it down into smaller, manageable chunks, it’s a very achievable weekend project. We’ll walk through each phase together, focusing on getting it done right, safely, and with a result that looks like a pro was there.
The first few steps are all about preparation, and they are non-negotiable for a safe and clean install.
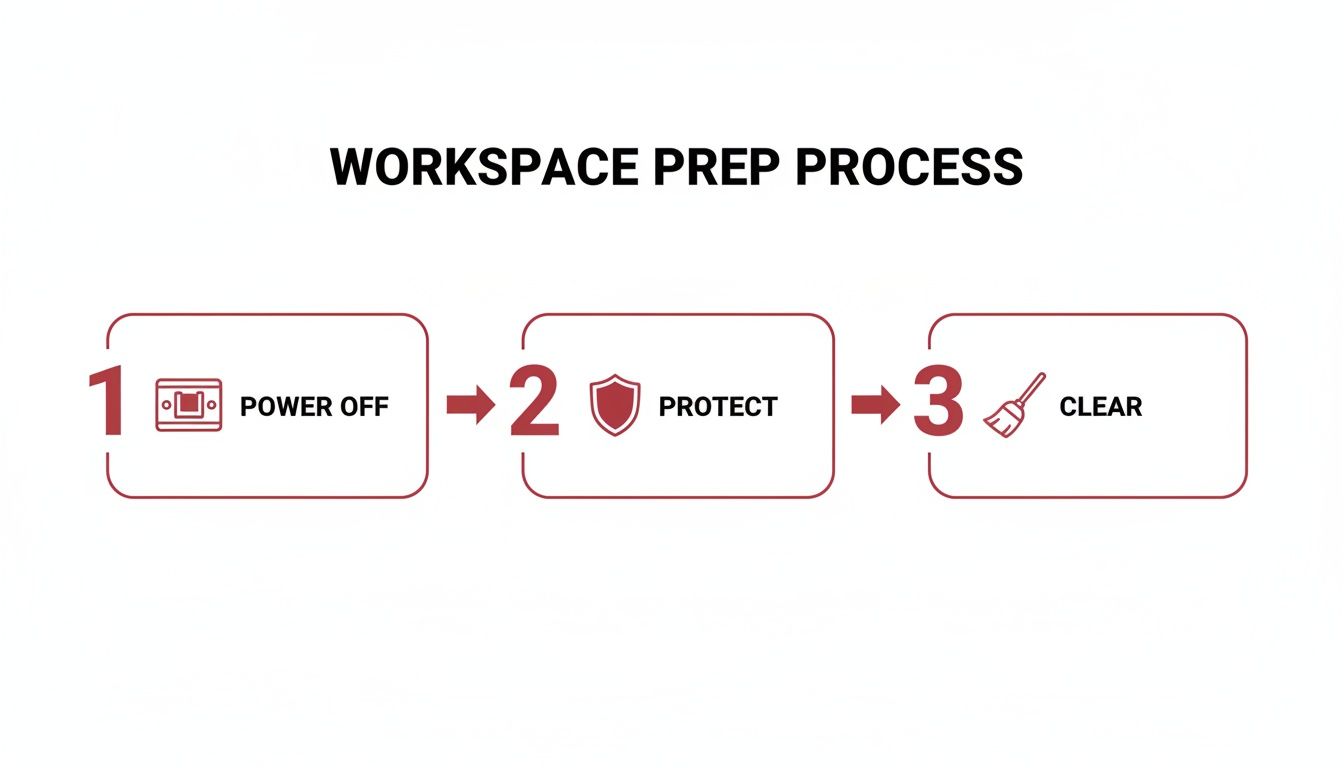
This simple three-step sequence—powering off, protecting surfaces, and clearing the area—is the foundation every good installation is built on. Don’t skip it.
Step 1: Mapping the Path and Making the Cuts
First thing’s first: you need to figure out exactly where everything is going to go. For a ducted system, this means planning the most direct route for your ductwork from the hood straight to the exterior wall or roof.
The golden rule here is shorter and straighter is always better. Every single bend or extra foot of ducting you add reduces your fan’s efficiency. Grab your tape measure and level to mark the center point above your cooktop, either on the wall or on the underside of the cabinet. This centerline is your north star for all other measurements.
Using that centerline, take the paper template that came with your hood and mark the mounting screw locations and the cutout for the ducting and electrical wires.
A Pro Tip for Clean Cuts: Before you even think about cutting into your wall or cabinet, use a good stud finder to check for studs, pipes, or wiring hiding behind the surface. When it comes to cutting drywall, a sharp utility knife does the job for straight lines, while a jigsaw is your best friend for making clean, precise openings in cabinets.
Step 2: Securely Mounting the Vent Hood Unit
Now for the moment of truth—getting the appliance up on the wall. Trust me on this, it’s a two-person job. Don’t even try to wrangle a heavy, awkward vent hood by yourself. Having a helper hold the unit steady while you drive in the screws is non-negotiable for safety and for getting it perfectly level.
Start by drilling pilot holes where you marked your mounting points. If you got lucky and your mounting points land on a wall stud (the ideal scenario), you can drive the screws right into the wood. If you’re mounting to drywall, you absolutely must use heavy-duty wall anchors rated to support the hood’s weight.
Next, lift the hood into place, carefully feeding any electrical wiring through its designated opening. While your helper holds it flush against the wall or cabinet, drive the mounting screws in, but don’t tighten them all the way just yet. Place your level on the bottom edge of the hood and make tiny adjustments until that bubble is perfectly centered. Once it’s level, go ahead and tighten all the screws securely.
A wobbly hood is more than just an annoyance; it’s a hazard. Take your time here. A level, securely mounted hood is the hallmark of a job well done.
Step 3: Running Ductwork for a Ducted System
If you chose a ducted hood, this is where the real work begins. Your goal is to create a completely airtight channel that pulls cooking exhaust from your kitchen and sends it outside.
Here’s what you need to focus on:
- Use Rigid Ducting: While that flexible dryer-vent-style ducting might seem easier to work with, it creates way more air resistance and noise. Always opt for smooth, rigid metal ducting whenever you can.
- Connect and Seal: Connect the sections of ducting, starting from the hood’s exhaust port and working your way toward the exterior vent. Use a high-quality aluminum foil tape—not the gray fabric stuff—to seal every single seam and joint. An airtight seal is critical for preventing grease-filled air from leaking into your walls or attic.
- Install the Exterior Cap: On the outside of your home, you’ll install a wall or roof cap. This little piece is what keeps rain, pests, and drafts from getting into your house through the ductwork. Make sure you seal it to the exterior wall with a weatherproof caulk or silicone to create a watertight barrier.
A common headache is when the duct hole in the wall doesn’t line up perfectly with the hood’s vent. A special “periscope” duct can be a lifesaver in this situation. It’s a flat, adjustable piece that lets you offset the connection without having to tear apart your wall.
Step 4: Making the Electrical Connections Safely
Connecting the wiring is often the most intimidating part of the job, but for most modern hoods, it’s actually pretty simple. Your hood will typically come with three wires: black (hot), white (neutral), and green or bare copper (ground).
With the circuit breaker still off, you’ll connect these to the corresponding wires coming from the wall. You just have to match the colors—black to black, white to white, and ground to ground—and secure each connection with a wire nut. Once they’re tight, gently tuck the wires back into the electrical box.
That said, be honest with yourself about your comfort level here.
Electrical work carries real risks. If you have older wiring, aren’t sure which wires are which, or feel even slightly hesitant, this is the time to call a licensed electrician. The small cost is well worth the peace of mind knowing the job was done safely and to code.
Once everything is mounted, sealed, and wired up, you’re on the home stretch. The physical installation is done, and you’re just a few final checks away from enjoying a cleaner, fresher kitchen.
Putting the Finishing Touches on Your Vent Hood Installation
With all the heavy lifting out of the way, it’s time for the most satisfying part: firing it up for the first time. This is where you double-check that everything is running perfectly and set yourself up for years of smoke-free, trouble-free cooking. Don’t rush these final steps—a few extra minutes now can save you from dealing with an annoying rattle or weak suction down the road.
First, head back to your breaker box and flip the power back on. Now for the moment of truth. Go ahead and switch on the vent hood’s lights to make sure they’re working properly. Next, test the fan, cycling through every single speed from the lowest setting to the highest.
While the fan is running, just listen. A slight hum is perfectly normal, but if you hear any loud rattling or scraping noises, something’s not quite right. It could be a loose screw or even a fan blade hitting something. For those with a ducted system, this is also the perfect time to run your hand along the duct connections while the fan is on high. Feel for any air escaping—a tight seal is absolutely critical for getting the best performance.
Troubleshooting Common Post-Installation Hiccups
Even when you’re careful, a small issue can pop up. Don’t sweat it. Most of the time, the fix is surprisingly simple.
- An Annoying Rattle: Nine times out of ten, this is just a loose mounting screw. Go back and check that every screw holding the hood to the wall or cabinets is tightened down completely. Occasionally, the metal ductwork itself might vibrate against a wall stud; a small piece of foam insulation wedged in between can work wonders to quiet it down.
- Weak Suction: If you have a ducted hood, an air leak is almost always the culprit. Re-check every single seam in your ductwork and make sure it’s sealed tight with aluminum foil tape. For a ductless model, double-check that the charcoal filters are seated correctly and aren’t blocked by anything.
- Lights or Fan Won’t Turn On: Start with the easiest fix: make sure the circuit breaker is actually on. If it is, kill the power again and take another look at your wiring connections to confirm they’re secure.
A Simple Maintenance Routine for Peak Performance
Think of your range hood as an investment in your home’s air quality. A little bit of routine care will go a long way in protecting it. The single most important task is cleaning or replacing the filters, which are the first line of defense against grease and odors that can clog up the motor.
Regular filter maintenance is more than just about performance—it’s a critical safety measure. Grease-caked filters can quickly become a serious fire hazard. Keeping them clean is one of the simplest things you can do to keep your kitchen safe.
Here’s a basic schedule that works for most homes:
- Mesh & Baffle Filters (Grease Traps): You’ll find these in both ducted and ductless hoods. They’re usually made of aluminum or stainless steel and need a good cleaning every 1-3 months, depending on your cooking habits. The best part? Most are dishwasher-safe.
- Charcoal Filters (Odor Eaters): These are only found in ductless (recirculating) hoods. You can’t clean these, so they need to be replaced every 3-6 months to keep absorbing cooking smells effectively.
Don’t forget about the outside of the hood, either. To keep it looking brand new, check out our guide on how to clean stainless steel for tips that will leave it shining without any streaks. This commitment to maintenance is backed by the pros; with over 67 million units installed worldwide in recent years, regular filter swaps are cited as essential for longevity. Plus, a clean hood can reduce kitchen fire incidents by up to 40% by capturing grease before it becomes a problem. You can find more range hood market trends on marketgrowthreports.com.
Common Questions About Installing a Vent Hood
Even with the best instructions in hand, a few questions always pop up right before you start drilling holes in your kitchen walls. It’s completely normal. Think of this as the final check-in with a knowledgeable friend before you get to work—these are the real-world details that separate a good installation from a great one.
Let’s clear up some of the most common head-scratchers homeowners run into.
How high should my vent hood be above the cooktop?
This is probably the single most important measurement you’ll take. Getting it right is everything when it comes to performance and safety. The goal is to create a “capture zone” that funnels smoke and steam effectively without being so close it becomes a fire hazard or blocks your view.
As a general rule, you want the bottom of the hood to be 24 to 30 inches above an electric cooktop. If you’ve got a gas range, you’ll need a little more breathing room—aim for 28 to 36 inches. Those open flames throw off a lot more heat, so the extra space is a critical safety buffer.
But here’s the most important tip: always treat the manufacturer’s manual as gospel. Some high-power or pro-style hoods have very specific height requirements to work correctly and safely. Their recommendation trumps any general rule.
Sticking to these guidelines ensures your hood is close enough to do its job but far enough away to keep you safe and give you a clear view of what you’re cooking.
Can I really install a ducted hood myself?
For a lot of homeowners, the answer is a confident yes. If you’re comfortable with basic DIY skills—using a drill, measuring accurately, finding wall studs, and maybe some light wiring—then a standard under-cabinet or wall-mount hood is a totally manageable weekend project. Patience and following the instructions are your best friends here.
However, there are definitely times when calling a pro is the smart move. You should seriously consider hiring an expert if your project involves any of the following:
- Complex Ductwork: Trying to snake ducts through multiple walls, floors, or a tricky attic space can get complicated fast.
- Tough Exterior Walls: Cutting a clean hole through brick, stucco, or thick concrete isn’t a job for a standard drill. It requires specialized tools and know-how.
- Electrical Uncertainty: If you’re looking at old wiring, aren’t sure about the circuit, or just don’t feel 100% confident with the electrical connections, an electrician is money well spent.
- Heavy or Awkward Units: Those big, beautiful island hoods or commercial-grade wall units can be incredibly heavy. Trying to lift one into place without professional help is a recipe for a damaged hood, a damaged back, or both.
There’s a lot of satisfaction in a DIY installation, but there’s absolutely no shame in calling for backup when the job gets tough.
What is CFM and how much power do I need?
Let’s demystify one of the biggest acronyms you’ll see: CFM, which stands for Cubic Feet per Minute. In simple terms, it’s just a measurement of how much air the fan can move in one minute. More CFM means more suction.
So, how much do you actually need? That depends on your stove.
- For Gas Cooktops: A good rule of thumb is to have 100 CFM of power for every 10,000 BTUs your range produces. If a typical gas stove has a total output of 40,000 BTUs, a 400 CFM hood is a solid starting point.
- For Electric Cooktops: Since electric and induction stoves don’t have an open flame, their ventilation needs are a bit lower. A hood in the 300 to 600 CFM range is usually more than enough for most home kitchens.
Resist the urge to just buy the most powerful hood you can find. An overpowered fan will be incredibly loud, waste energy, and can even create negative air pressure problems in a well-sealed house. The real goal is to match the power to your specific cooking needs for a balanced, quiet, and effective system.
Does the shape of the ducting matter?
Oh, absolutely. The type of ducting you use—and the path it takes to get outside—has a massive impact on your hood’s performance and how loud it is. The golden rule is to create the straightest, shortest path possible for the air to escape.
Here are the key things to get right:
- Rigid Over Flexible: Always, always choose rigid metal ducting instead of that flimsy, slinky-like foil tubing. Rigid ducts create a smooth, unobstructed path for air, which improves suction and makes the whole system much quieter. Flexible ducts create turbulence that kills airflow and forces the fan to work way harder than it should.
- Round vs. Rectangular: From an airflow perspective, round ducting is king. It’s simply the most efficient shape. However, you’ll sometimes need rectangular ducts to fit inside a standard 2×4 wall. If you have the choice, go with round.
- Proper Sizing: Don’t sabotage your powerful new fan by connecting it to an undersized duct. Use the exact duct diameter recommended by the hood’s manufacturer (usually 6 to 8 inches). Using a smaller duct is like trying to breathe through a straw—it chokes the fan, reduces effectiveness, and ramps up the noise.
Every bend, or elbow, you add to the duct run cuts down on efficiency. A little extra time spent planning a direct route from the start will pay off every single time you use your new vent hood.
Upgrading your kitchen ventilation is one of those projects that pays you back immediately with a cleaner, fresher-smelling home. For more in-depth home improvement guides and honest product reviews, explore the resources at Reva Housing and make your next project a success. Learn more at https://revahousing.com.